ChevyParts
My Garage
My Account
Cart
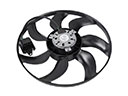
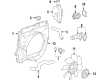
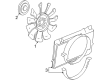
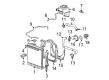
OEM Hummer Fan Shroud
Radiator Fan Shroud- Select Vehicle by Model
- Select Vehicle by VIN
Select Vehicle by Model
orMake
Model
Year
Select Vehicle by VIN
For the most accurate results, select vehicle by your VIN (Vehicle Identification Number).
5 Fan Shrouds found


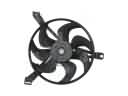
Hummer Fan Shroud Part Number: 15780789
$224.71 MSRP: $424.99You Save: $200.28 (48%)Ships in 1-2 Business DaysProduct Specifications- Other Name: Shroud Kit, Radiator Fan Shroud; Dual Radiator and Condenser Fan Assembly; Cooling Fan Assembly; Shroud


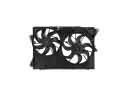
Hummer Fan Shroud Part Number: 15207758
$141.26 MSRP: $211.16You Save: $69.90 (34%)Product Specifications- Other Name: Shroud, Radiator Fan Shroud; Shroud, Engine Air Cooling(Electrical)


Hummer Fan Shroud Part Number: 15183154
Product Specifications- Other Name: Shroud, Radiator Fan Shroud; Shroud, Engine Air Cooling(Electrical)


Hummer Upper Shroud Part Number: 25862433
Product Specifications- Other Name: Shroud, Radiator Fan Shroud; Fan Shroud
- Position: Upper

Hummer Lower Shroud Part Number: 25862431
Product Specifications- Other Name: Shroud-Engine Coolant Fan Lower; Fan Shroud; Shroud, Radiator Fan Shroud
- Position: Lower
- Replaces: 25801977
Hummer Fan Shroud
Choose OEM Fan Shroud, you're making the optimal decision for superior quality and perfect performance. You can feel confident because each component goes through stringent quality checks. Every part is carefully built to comply with Hummer's factory specifications. You'll enjoy a smooth, worry-free installation that fits just right. At ChevyPartsDeal.com, you'll find it easy to get top-quality OEM Hummer Fan Shroud. You can shop at highly competitive prices and protect your budget. All our genuine Hummer parts include a dependable manufacturer's warranty. You'll also appreciate our straightforward return policy and swift delivery services for extra convenience.
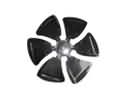
Hummer Fan Shroud channels the fresh air directly into the radiator, which keeps the engine cool in case the trail becomes rough. The product of a military fable, Hummer became famous in the 1990s by overcoming mud, rocks and steep cliffs with its tall ground clearance, armored-like suspension, and intelligent four-wheel drive that allow the driver to alternate the modes by using simple dashboard controls. Large windows allow one to see meandering roads clearly, and the seats are wide and allow friends to sit comfortably as the V8 growls. A Hummer looks like a stiff frame, with shining gauges displaying both pitch and temperature, and it makes each flow across a stream feel like a casual puddle and it gives a sense of assurance that the adventure will not come to an end. A Fan Shroud refers to a shape that goes over the fan, which closes the openings allowing air to pass through the radiator to regulate the heat. Installation of new Fan Shroud requires that the Hummer be parked, the engine cooled, and the battery disconnected. Removing any type of plastic shields or hose that hides the radiator, unbolt the old shroud and remove it very carefully without damaging the blades. Snug the bolts by hand then tighten with a wrench pulling the replacement Fan Shroud into position down the same line matching the tabs with the holes. Reconnect the shields and hoses, connect the battery once more, rotate the fan to make sure it is clear, turn on the engine, and monitor the well-established airflow and the constant temperature.