ChevyParts
My Garage
My Account
Cart
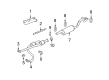
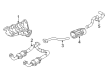
OEM GMC Yukon XL 1500 Exhaust Manifold
Engine Exhaust Manifold- Select Vehicle by Model
- Select Vehicle by VIN
Select Vehicle by Model
orMake
Model
Year
Select Vehicle by VIN
For the most accurate results, select vehicle by your VIN (Vehicle Identification Number).
5 Exhaust Manifolds found


GMC Yukon XL 1500 Exhaust Manifold, Driver Side Part Number: 12616285
$131.69 MSRP: $229.79You Save: $98.10 (43%)GMC Yukon XL 1500 Exhaust Manifold Part Number: 12677665
$236.46 MSRP: $372.05You Save: $135.59 (37%)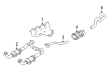
GMC Yukon XL 1500 Exhaust Manifold, Driver Side Part Number: 12571679
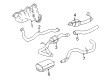
GMC Yukon XL 1500 Exhaust Manifold
Want to cut long-term maintenance and repair costs? Choose OEM Exhaust Manifold. Those parts deliver top durability you can trust. On our site, you'll find a huge catalog of genuine GMC Yukon XL 1500 parts. Prices are unbeatable, so you can keep more in your pocket. Every OEM GMC Yukon XL 1500 Exhaust Manifold includes a manufacturer's warranty. You can also get an easy return policy that keeps buying risk free. Fast delivery, get your car on the road quickly. It's simple to search, compare, and order. Stop guessing about quality or fit. Order today and save with parts that last.
GMC Yukon XL 1500 Exhaust Manifold Parts and Q&A
- Q: How to replace the right exhaust manifold on GMC Yukon XL 1500?A:The procedure to replace the right Exhaust Manifold requires lifting and suspending the vehicle before removing Exhaust Manifold pipe nuts and lowering the vehicle. Unscrew the Spark Plugs then break loose bolts(1,2,3) which secure the exhaust gas recirculation(EGR) valve pipe to the Intake Manifold and Cylinder Head and Exhaust Manifold. Mild force should be used to pull the egr valve pipe off the Intake Manifold before discarding both the gasket and o-ring seal. You should first detach the crossover bolt connecting the secondary air injection (AIR) check valve pipe (crossover) to the check valves while repositioning the hose spring clamps. After that, cut the check valve pipe (crossover) from the check valves only when replacement is needed. Start by removing the right Exhaust Manifold check valve pipe nuts and pipe (with check valve) as well as gasket followed by removing Exhaust Manifold bolts, manifold and gasket which needs discarding. The exhibition of the Exhaust Manifold requires bolt removal from both heat shield and shield components. Secure the Exhaust Manifold with heat shield and its bolts when needed then torque heat shield bolts to 9 nm (80 inch lbs.). Follow the designated torque values for Exhaust Manifold bolt torque while cleaning all threads of the Cylinder Head Exhaust Manifold bolt openings from debris. Apply threadlock gm p/n 12345493 or equivalent to a 5 mm (0.2 inch) wide band that covers the Exhaust Manifold bolt threads. Then install the new gasket with the Exhaust Manifold and bolts. Start by tightening the Exhaust Manifold bolts from the center to both sides with the torque sequence of 15 nm (11 ft. Lbs.) followed by 25 nm (18 ft. Lbs.). Use a flat punch tool to bend the exposed portion of Exhaust Manifold gasket sealant situated at the front of the right Cylinder Head. Connect a new air check valve pipe gasket and the nuts and pipe with check valve to the right Exhaust Manifold before tightening the nuts to 25 nm (18 ft. Lbs.). Position the hose spring clamps while you attach the air check valve pipe (crossover) to the check valves. Tighten the crossover bolt to 50 nm (37 ft. Lbs.). Getting a new o-ring seal ready with engine oil prevents leakage before installation within the egr valve pipe. The egr pipe then needs to be installed in the secured position. Use a criss-cross method to fasten the egr valve pipe bolts until tight while torquing the egr valve pipe to Intake Manifold bolt to 10 nm (89 inch lbs.), the egr valve pipe to Cylinder Head bolts to 50 nm (37 ft. Lbs.), as well as the egr valve pipe to Exhaust Manifold bolts to 30 nm (22 ft. Lbs.). Put the spark plugs in place and elevate the vehicle afterward installing the Exhaust Manifold pipe nuts and tightening them to 50 nm (37 ft. Lbs.) before returning it to ground level.
- Q: How to replace the left exhaust manifold on GMC Yukon XL 1500?A:First support the car before you disconnect the Exhaust Manifold pipe nuts under the left Exhaust Manifold and let the vehicle down. First remove the Spark Plugs and engine coolant temperature (ECT) sensor while unbolting the junction block bracket and subsequently moving the junction block. You should remove the bolt that secures the air check valve pipe crossover and position spring clamps on the crossover hose. Both check valves should remain installed on the air pipe crossover when you detach it from the check valves except in cases where check valve replacement becomes necessary. Remove the left Exhaust Manifold air check valve pipe nuts along with the pipe (contains the check valve) and its gasket to access the Exhaust Manifold bolts. Discard the gasket and remove all manifold bolts while keeping the piece and gasket of pipe components. You should disassemble the Exhaust Manifold heat shield bolts and shield when required in this process. Fix the heat shield to the Exhaust Manifold when needed then fasten its bolts to 9 nm (80 inch lbs.). To prevent exhaust problems and proper on-board diagnostics (OBD) 11 operation necessitate a specified torque value on Exhaust Manifold bolts with thread hole cleaning on the cylinder head Exhaust Manifold bolt holes. Threadlock gm p/n 12345493 or equivalent applied as a 5 mm (0.2 inch) wide band should be used on the Exhaust Manifold bolts before installing the Exhaust Manifold with a new gasket and bolts. Begin by tightening the Exhaust Manifold bolts to 15 nm (11 ft. Lbs.) from the middle bolts outwards side-to-side, followed by final tightening to 25 nm (18 ft. Lbs.) with the same alternating pattern. Using a flat punch to bend the exposed Exhaust Manifold gasket that faces the left cylinder head rear section, install the pipe with check valve and its new air check valve pipe gasket and nuts onto the left Exhaust Manifold then torque these nuts to 25 nm (18 ft. Lbs.). Secure the air check valve pipe (crossover) to the check valves then apply the air check valve pipe (crossover) hose spring clamps before bolt installation with 50 nm (37 ft-lbs) torque. Install the junction block onto the generator bracket before tightening its bracket bolts to 9 nm (80 inch lbs.). To finish the installation sequence you must install the ect sensor, spark plugs while raising the vehicle before installing the Exhaust Manifold pipe nuts by tightening them to 50 nm (37 ft. Lbs.).

Related GMC Yukon XL 1500 Parts
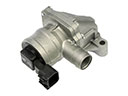 GMC Yukon XL 1500 Air Pump Check Valve
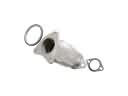 GMC Yukon XL 1500 Catalytic Converter
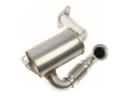 GMC Yukon XL 1500 EGR Filter
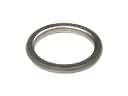 GMC Yukon XL 1500 Exhaust Flange Gasket
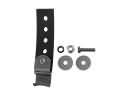 GMC Yukon XL 1500 Exhaust Hanger
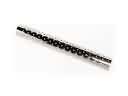 GMC Yukon XL 1500 Exhaust Heat Shield
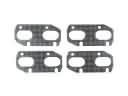 GMC Yukon XL 1500 Exhaust Manifold Gasket
 GMC Yukon XL 1500 Exhaust Pipe
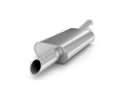 GMC Yukon XL 1500 Muffler
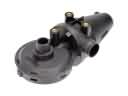 GMC Yukon XL 1500 PCV Valve
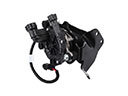 GMC Yukon XL 1500 Secondary Air Injection Pump
 GMC Yukon XL 1500 Tail Pipe