ChevyParts
My Garage
My Account
Cart
OEM GMC Sonoma Fuel Injector
Gas Injector- Select Vehicle by Model
- Select Vehicle by VIN
Select Vehicle by Model
orMake
Model
Year
Select Vehicle by VIN
For the most accurate results, select vehicle by your VIN (Vehicle Identification Number).
11 Fuel Injectors found


GMC Sonoma Injector Part Number: 19244616
$118.27 MSRP: $246.20You Save: $127.93 (52%)Ships in 1 Business Day
GMC Sonoma Injector Part Number: 88894353
$120.24 MSRP: $244.20You Save: $123.96 (51%)Ships in 1-2 Business Days
GMC Sonoma Injector Part Number: 17111468
$154.07 MSRP: $276.36You Save: $122.29 (45%)Ships in 1-3 Business Days


GMC Sonoma Injector Part Number: 17111986

GMC Sonoma Throttle Body Part Number: 17112622
GMC Sonoma Injector Part Number: 17113512
GMC Sonoma Injector Part Number: 17091432

GMC Sonoma Injector Part Number: 17113674

GMC Sonoma Throttle Body Part Number: 17113673

GMC Sonoma Throttle Body Part Number: 17112228
GMC Sonoma Throttle Body Part Number: 17112042
GMC Sonoma Fuel Injector
Want to cut long-term maintenance and repair costs? Choose OEM Fuel Injector. Those parts deliver top durability you can trust. On our site, you'll find a huge catalog of genuine GMC Sonoma parts. Prices are unbeatable, so you can keep more in your pocket. Every OEM GMC Sonoma Fuel Injector includes a manufacturer's warranty. You can also get an easy return policy that keeps buying risk free. Fast delivery, get your car on the road quickly. It's simple to search, compare, and order. Stop guessing about quality or fit. Order today and save with parts that last.
The GMC Sonoma Fuel Injector is one of the main parts that directly contribute to the efficient operation and durability of the GMC Sonoma a compact pickup truck made from 1982 to 2005. This Fuel Injector is charged with the task of supplier the right quantity of fuel in the engine cylinder hence ensuring an ideal air-fuel mixture that improves the operation of the engine. Due to its flexibility and professed toughness, GMC Sonoma Fuel Injector is considered by many as part of the car's fuel injection system. Its versatility can be explained by the compatibility with different Sonoma models including the GT sports version and the stock unit; four-cylinder and V6 engines. Apart from enhancing the fuel economy, GMC Sonoma Fuel Injector also assist in boosting the safety of the car by avoiding any catastrophes related to the engine that may come from inefficient fuel supply. Some of the primary characteristics of the GMC Sonoma Fuel Injector that are worthy of attention include; As with most modern applications, the design features of the fuel injector are tailored to both direct and indirect injection varieties that play a vital role in optimizing the vehicle's performance. The Growth and Development of the Fuel Injector on the GMC Sonoma gives the brand a one-up on their competitors, while at the same time improving the quality of the cars; thus the smooth and powerful performance of the vehicle. Therefore, the pullout of the GMC Sonoma and its Fuel Injector does not detract from the fact that they are products that have been adored for versatility and durability in performance thus playing great roles in the automotive industry.
GMC Sonoma Fuel Injector Parts and Q&A
- Q: How to clean the fuel injector on GMC Sonoma?A:The first step to Fuel Injector cleaning requires loosening the fuel filler cap to decrease Fuel Tank vapor pressure. The technician should start by disconnecting the pcv clean air tube from the air inlet duct before proceeding to remove the resonator and air inlet duct from the Throttle Body. Detach first the Brake Booster Vacuum Hose and connector from the Intake Manifold followed by removal of the electrical connector from the central sequential fuel injection (CSFI) fuel metering body. Before maintenance start you need to remove Spark Plug Wires from cylinders 1, 3, and 5 at the Distributor Cap and disconnect fuel line bolt at the rear of the Intake Manifold. Circulate cool engine coolant through the fuel system before untightening the fuel pipe nuts while removing the clamp. Take the fuel pipes away from the metering body. The fuel pipe o-ring and washers and spacers need to stay in their right locations. Assemble the fuel metering body jumper block (J 44466-12CSFI) and screws (J 44466-13) to the metering body then tighten it followed by attaching the fuel transfer tube recycling tube (J 44466-11IAFM) and its clamp, screws to the fuel pipe. The evap pressure/purge diagnostic station (J 41413) enables you to close the tank valve while removing the regulator assembly for installation of the regulator and hose assembly (J 44466-10). Fasten a hose between the regulator and fuel metering body jumper block. Connect the Fuel Injector coil/balance tester (J 39021) with the injector switch box (J 39021-210) and injector harness connector (4.3L) (J 39021-301) to the metering body electrical connector at 0.5 amps setting on the amperage switch of the tester. Open both valves to increase the fuel system pressure until it reaches least 150 psi. Use the tester machine to operate each injector while observing the pressure decrease which proves correct injector/poppet valve function. Do the procedure again when an injector does not operate properly until it functions properly. Close the tank pressure valve after testing all injectors while releasing all pressurized fuel at the regulator. The next steps include putting back the pcv fresh air tube followed by disconnection of the regulator from the fuel metering body jumper block and diagnostic station and also removal of injector testing equipment. Reinstall the vehicle electrical connector to the metering body then connect the Brake Booster Vacuum Hose followed by the ignition wires. To complete the repairs you should join the air intake duct and resonator while making sure all fasteners remain by hand just tight. Place the Fuel Injector cleaner (J 38500-A) in position while making sure its valve at the canister base remains sealed then proceed to add gm p/n 12346535 top engine cleaner and standard unleaded gas into the canister. Support the cleaner at a suitable placement under the hood and open the valve at the bottom of the cleaner after you connect the hose to the service port of the fuel metering body jumper block. Use a shop air source to feed the fitting at the cleaner top and set its regulator to 75 psi before allowing the vehicle to empty the canister. The process ends with disconnection of the hose and cleaning the shop air and depressurizing the unit. Bleed the remaining pressure from the fuel metering body jumper block by repeating the procedure of removing the pcv clean air tube, resonator and ignition wires. Service the fuel transfer tube recycling tube along with the fuel metering body screws before reinstalling the fuel pipe by verifying that o-rings, washers and spacers are present in their designated positions. Secure all nuts with threadlock on the fuel pipe bolt before its installation and tightening. Reinstall the Brake Booster Vacuum Hose, the resonator and the air inlet duct and the ignition wires. You must add port Fuel Injector cleaner gn p/n 12345104 (or P/N 12345515 in Canada) at one ounce per gallon of gasoline in the Fuel Tank before tightening the fuel cap manually and testing for leaks while verifying powertrain dtc codes with a tech ii scan tool. Clear any stored codes as needed. The scan tool needs to be disconnected and the customer must change fuel brands.

Related GMC Sonoma Parts
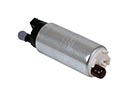 GMC Sonoma Fuel Pump
 GMC Sonoma Air Duct
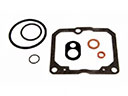 GMC Sonoma Carburetor Gasket Kit
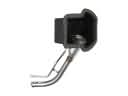 GMC Sonoma Fuel Filler Neck
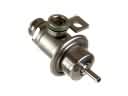 GMC Sonoma Fuel Pressure Regulator
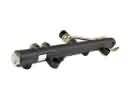 GMC Sonoma Fuel Rail
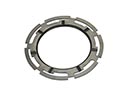 GMC Sonoma Fuel Tank Lock Ring
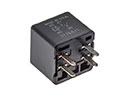 GMC Sonoma HVAC Relay
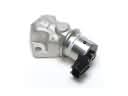 GMC Sonoma Idle Control Valve
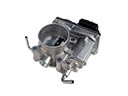 GMC Sonoma Throttle Body
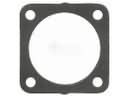 GMC Sonoma Throttle Body Gasket
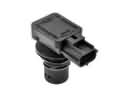 GMC Sonoma Vapor Pressure Sensor