ChevyParts
My Garage
My Account
Cart
OEM GMC Sonoma Ball Joint
Control Arm Joint- Select Vehicle by Model
- Select Vehicle by VIN
Select Vehicle by Model
orMake
Model
Year
Select Vehicle by VIN
For the most accurate results, select vehicle by your VIN (Vehicle Identification Number).
5 Ball Joints found


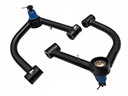
GMC Sonoma Ball Joint, Front Upper Part Number: 88911387
$34.91 MSRP: $62.33You Save: $27.42 (44%)Ships in 1-3 Business Days
GMC Sonoma Lower Ball Joint, Front Part Number: 17980954
$65.21 MSRP: $107.41You Save: $42.20 (40%)Ships in 1-2 Business Days
GMC Sonoma Lower Ball Joint Part Number: 88967425
$65.21 MSRP: $107.41You Save: $42.20 (40%)Ships in 1-2 Business Days
GMC Sonoma Ball Joint, Front Lower Part Number: 19416895

GMC Sonoma Upper Ball Joint, Front Part Number: 19133669
GMC Sonoma Ball Joint
Want to cut long-term maintenance and repair costs? Choose OEM Ball Joint. Those parts deliver top durability you can trust. On our site, you'll find a huge catalog of genuine GMC Sonoma parts. Prices are unbeatable, so you can keep more in your pocket. Every OEM GMC Sonoma Ball Joint includes a manufacturer's warranty. You can also get an easy return policy that keeps buying risk free. Fast delivery, get your car on the road quickly. It's simple to search, compare, and order. Stop guessing about quality or fit. Order today and save with parts that last.
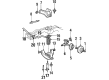
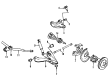
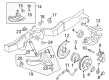
Ball Joint as a part of the suspension system and steering mechanism in GMC Sonoma automobiles is responsible for clamping the control arms to the steering knuckles for free rotation on two axes but not translation. Usually of steel construction, a ball joint entails a bearing stud and socket which is covered in a rubber boot, to keep it from coming in contact with dirt and to allow for lubricant to travel. These components have mostly eliminated the earlier kingpin design bringing greater caster and camber angle adjustability without unwanted flexibility making the vehicles handle better, more stable, and providing a comfortable ride. The contemporary ball joints in cars are generally designed to be lubrication-free and have a longer cycle life and thus last for abou 80 000 miles.
GMC Sonoma Ball Joint Parts and Q&A
- Q: How to replace the upper ball joint on GMC Sonoma?A:Secure a vehicle lift and safety stands underneath in preparation for replacing the upper Ball Joint. Take off the Torsion Bar and disconnect the wheel speed sensor wiring harness bracket and brake hose bracket by removing their mounting bolt and nut from the upper Control Arm. Take the brackets away from the upper Control Arm and remove the cotter pin before the retaining nut at the Ball Joint. With a pry bar under the Control Arm push up then a helper hits the knuckle stud near the Ball Joint to loosen it. Support the upper Control Arm and Steering Knuckle with a block to keep them aside when you take the upper Ball Joint from the Steering Knuckle before suspending the Steering Knuckle to prevent Brake Line damage. Pozisyon the upper Ball Joint from the Steering Knuckle by drilling 12.7 mm (1/2 inch) holes into rivet heads then removing them with a pin punch and upper Ball Joint. Insert the new upper Ball Joint onto the upper Control Arm and tighten retaining bolts and nuts to 23 nm (17 ft. Lbs.). Thread in the upper Ball Joint to the Steering Knuckle and bolt it with a retaining nut until it reaches 83 nm (61 ft lbs.), making sure the Ball Joint stays aligned for the cotter pin without going beyond the one sixth turn limit. Install a fresh cotter pin into the Ball Joint stud system and form both ends to engage with the nut facility. Reattach the wheel speed sensor wiring harness and brake hose bracket to their positions on the Control Arm using the mounting bolt and nut which needs 24 nm (18 ft. Lbs.) torque. Put the Torsion Bar back in place, mount the tire and wheel, lower the vehicle, then inspect the steering wheel alignment.
- Q: How to inspect and service the ball joints on GMC Sonoma?A:Service the ball joints under stable conditions on a flat surface by positioning the vehicle correctly without rocking on stands and keeping the upper Control Arm bumper away from the frame. Put the vehicle in an elevated position and set a floor stand below the stabilizer bar bracket to hold the lower Control Arm. Test and replace the Ball Joint when you find damage on its seal surface. To check the Wheel Bearing health you need to examine its freedom of movement and take appropriate diagnostic steps if it is loose. Examine for Ball Joint horizontal looseness by placing the j 8001 dial indicator (J 8001) on the lowest part of the wheel rim and rocking the wheel left and right until the gauge shows no more than 0.080 inch movement. When fixing the lower Control Arm on rwd vehicles look for poor condition by taking the safety stand out and comparing the lower Ball Joint housing to the cover on a healthy joint since there should be 1.27 mm (0.050 inch) extension. When the housing sits level with the surface or worse replace the lower Ball Joint. Put the j 8001 dial indicator (J 8001) on the Spindle and check vertical movement when prying between the Control Arm and outer race of the 4wd lower Ball Joint; replace the joint if the indicator shows more than 0.125 inch vertical clearance. When the lower Ball Joint shows good specs you should test the upper Ball Joint by disconnecting it to check for looseness and replace if needed.


Related GMC Sonoma Parts
 GMC Sonoma Control Arm
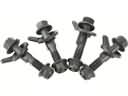 GMC Sonoma Alignment Bolt
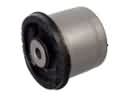 GMC Sonoma Axle Beam Mount
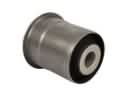 GMC Sonoma Axle Support Bushings
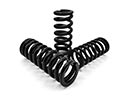 GMC Sonoma Coil Springs
 GMC Sonoma Control Arm Bolt
 GMC Sonoma Control Arm Bushing
 GMC Sonoma Sway Bar Bracket
 GMC Sonoma Sway Bar Bushing
 GMC Sonoma Sway Bar Kit
 GMC Sonoma Torsion Bar
 GMC Sonoma Wheel Cover