ChevyParts
My Garage
My Account
Cart
OEM GMC Savana 3500 Brake Master Cylinder
- Select Vehicle by Model
- Select Vehicle by VIN
Select Vehicle by Model
orMake
Model
Year
Select Vehicle by VIN
For the most accurate results, select vehicle by your VIN (Vehicle Identification Number).
11 Brake Master Cylinders found


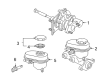
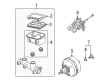
GMC Savana 3500 Master Cylinder Part Number: 19420962
$192.14 MSRP: $347.75You Save: $155.61 (45%)Ships in 1-2 Business DaysGMC Savana 3500 Master Cylinder Part Number: 19420963
$211.49 MSRP: $420.73You Save: $209.24 (50%)Ships in 1 Business DayGMC Savana 3500 Master Cylinder Part Number: 85105169
$144.57 MSRP: $271.50You Save: $126.93 (47%)Ships in 1-3 Business Days
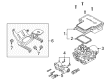
GMC Savana 3500 Master Cylinder Assembly Part Number: 19236088
$75.04 MSRP: $134.00You Save: $58.96 (44%)Ships in 1-3 Business DaysGMC Savana 3500 Master Cylinder Assembly Part Number: 18039263
$101.62 MSRP: $181.46You Save: $79.84 (44%)Ships in 1-3 Business Days


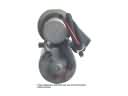
GMC Savana 3500 Master Cylinder Part Number: 19209268


GMC Savana 3500 Master Cylinder Part Number: 19209189

GMC Savana 3500 Overhaul Kit Part Number: 18022005
GMC Savana 3500 Master Cylinder Part Number: 25865166
GMC Savana 3500 Master Cylinder Part Number: 19209234


GMC Savana 3500 Master Cylinder Part Number: 19209198
GMC Savana 3500 Brake Master Cylinder
Want to cut long-term maintenance and repair costs? Choose OEM Brake Master Cylinder. Those parts deliver top durability you can trust. On our site, you'll find a huge catalog of genuine GMC Savana 3500 parts. Prices are unbeatable, so you can keep more in your pocket. Every OEM GMC Savana 3500 Brake Master Cylinder includes a manufacturer's warranty. You can also get an easy return policy that keeps buying risk free. Fast delivery, get your car on the road quickly. It's simple to search, compare, and order. Stop guessing about quality or fit. Order today and save with parts that last.
GMC Savana 3500 Brake Master Cylinder Parts and Q&A
- Q: How to replace the brake master cylinder on GMC Savana 3500?A:Before you begin replacing the Brake Master Cylinder you need to activate the park brake then block the wheels. Unplug the brake fluid sensor electrical connector if needed and take out the driver side fender support. Keep brake fluid clean by putting rubber stoppers on brake pipe outlets before you disconnect the pipes from master cylinder service. Vehicles with jl4 require you to compress the hose near the master cylinder before unscrewing the clamp and hose from the reservoir and plugging the reservoir port. Take out the master cylinder from the car once its nuts are removed afterward take the master cylinder reservoir along. First install the master cylinder reservoir before performing bench bleeding on the master cylinder and replacing it back into your vehicle. Fasten the master cylinder mounting nuts using 36 n.m torque (27 lb ft torque). When working with jl4 vehicles you need to rid the reservoir port of its plug then attach the hose and clamp to the reservoir before taking out the crimping tool from the hose. Join exposed brake pipe ends by fitting on and tightening the plastic covers at 25 n.m (18 lb ft). Reattach the brake fluid sensor power cable before placing on the driver side upper fender support and bleeding the brake hydraulic lines. Complete service by releasing parking brake then clearing all wheels.
- Q: How to overhaul the brake master cylinder on GMC Savana 3500?A:Starting the Brake Master Cylinder overhaul includes both reservoir cap removal and brake fluid drainage from the reservoir. Start by disconnecting the reservoir and grommets from the body of the master cylinder before placing the mounting flange in a vise clamp. First remove the snap ring followed by the primary Piston assembly and finally the seal. Carefully pull out the secondary Piston by directing a low air stream to the bore opening that is positioned 25 mm (1 inch) from a padded surface to catch the Piston avoiding all direct contact with people. Plug the rear port then apply pressure to the front port with air to remove the seals followed by removal of the spring retainer and spring. After cleaning metal components with denatured alcohol while cleaning rubber parts with brake fluid test the diaphragm function while inspecting the master cylinder bore for signs of corrosion especially when corrosion is detected the master cylinder requires replacement. Add clean dot 3 motor vehicle brake fluid as a lubricant for all parts which includes grommets, seals, and cylinder bore and select new seals for assembly. Begin by installing the secondary Piston spring and retainer before placing the primary seal and secondary seal to the secondary Piston, which needs to be inserted into the master cylinder body. Place the primary Piston assembly along with its installed seal into the master cylinder body while placing the snap ring and compressing the primary Piston to set it in place. Place two new grommets before you install the reservoir on the master cylinder body and the reservoir cap.


Related GMC Savana 3500 Parts
 GMC Savana 3500 ABS Pump And Motor Assembly
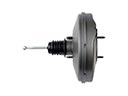 GMC Savana 3500 Brake Booster
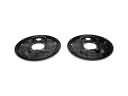 GMC Savana 3500 Brake Dust Shields
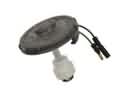 GMC Savana 3500 Brake Fluid Level Sensor
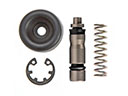 GMC Savana 3500 Brake Master Cylinder Repair Kit
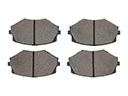 GMC Savana 3500 Brake Pads
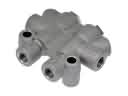 GMC Savana 3500 Brake Proportioning Valve
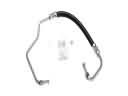 GMC Savana 3500 Hydraulic Hose
 GMC Savana 3500 Parking Brake Cable
 GMC Savana 3500 Spindle Nut
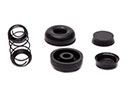 GMC Savana 3500 Wheel Cylinder Repair Kit
 GMC Savana 3500 Wheel Hub Bolt