ChevyParts
My Garage
My Account
Cart
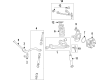
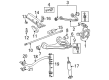
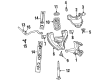
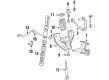
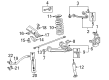
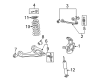
OEM GMC Savana 1500 Control Arm
Suspension Arm- Select Vehicle by Model
- Select Vehicle by VIN
Select Vehicle by Model
orMake
Model
Year
Select Vehicle by VIN
For the most accurate results, select vehicle by your VIN (Vehicle Identification Number).
15 Control Arms found


GMC Savana 1500 Upper Control Arm, Passenger Side Part Number: 25793553
$226.07 MSRP: $394.48You Save: $168.41 (43%)Ships in 1-2 Business Days


GMC Savana 1500 Upper Control Arm, Driver Side Part Number: 25793550
$226.07 MSRP: $394.48You Save: $168.41 (43%)Ships in 1-2 Business Days


GMC Savana 1500 Lower Control Arm, Passenger Side Part Number: 20869233
$197.36 MSRP: $344.41You Save: $147.05 (43%)Ships in 1-2 Business Days

GMC Savana 1500 Lower Control Arm, Passenger Side Part Number: 12475480
$280.32 MSRP: $445.05You Save: $164.73 (38%)Ships in 1-3 Business DaysGMC Savana 1500 Lower Control Arm, Driver Side Part Number: 20869232
$197.20 MSRP: $344.13You Save: $146.93 (43%)
GMC Savana 1500 Lower Control Arm, Front Driver Side Part Number: 19416906
$386.72 MSRP: $637.05You Save: $250.33 (40%)Ships in 1-2 Business Days
GMC Savana 1500 Upper Control Arm, Front Passenger Side Part Number: 19416905
$242.13 MSRP: $398.87You Save: $156.74 (40%)Ships in 1-2 Business Days


GMC Savana 1500 Upper Control Arm, Front Part Number: 15864153


GMC Savana 1500 Lower Control Arm, Driver Side Part Number: 15750830

GMC Savana 1500 Lower Control Arm, Driver Side Part Number: 12475479
$289.83 MSRP: $460.16You Save: $170.33 (38%)Ships in 1-3 Business DaysGMC Savana 1500 Upper Control Arm, Driver Side Part Number: 12543997
GMC Savana 1500 Upper Control Arm, Driver Side Part Number: 12361035
GMC Savana 1500 Control Arm
Want to cut long-term maintenance and repair costs? Choose OEM Control Arm. Those parts deliver top durability you can trust. On our site, you'll find a huge catalog of genuine GMC Savana 1500 parts. Prices are unbeatable, so you can keep more in your pocket. Every OEM GMC Savana 1500 Control Arm includes a manufacturer's warranty. You can also get an easy return policy that keeps buying risk free. Fast delivery, get your car on the road quickly. It's simple to search, compare, and order. Stop guessing about quality or fit. Order today and save with parts that last.
GMC Savana 1500 Control Arm Parts and Q&A
- Q: How to replace the lower control arm on a 4WD on GMC Savana 1500?A:You must start by supporting and raising the vehicle before removing the tire and wheel as well as all connecting parts including Torsion Bar and stabilizer link and wheel drive shaft. The procedure starts by taking off the shock absorber lower retaining nut and bolt and then the lower Ball Joint retaining nut. Remove the Steering Knuckle's lower Ball Joint with j 43631 Ball Joint remover and j 45851 Ball Joint separator protector adapters. You must remove lower Control Arm nuts and washers before taking out the lower Control Arm bolts then the lower Control Arm. You should begin installation with the lower Control Arm as the first step followed by the attachment of the lower Ball Joint to the Steering Knuckle. Fastener notice brings attention to service precautions before you install the lower Control Arm mounting bolts. After bolting the Control Arm into position you must apply 145 nm (107 ft. Lbs.) torque when tightening the lower Control Arm mounting nuts and washers. After installing the lower Ball Joint retaining nut secure it at 100 nm (74 ft. Lbs.) then complete installation by tightening the shock absorber lower retaining nut and bolt to 80 nm (59 ft. Lbs.). Reinstall the wheel drive shaft, stabilizer link, and Torsion Bar before putting the tire with wheel back on followed by vehicle lowering and wheel alignment inspection.

Related GMC Savana 1500 Parts
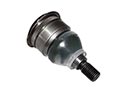 GMC Savana 1500 Ball Joint
 GMC Savana 1500 Coil Spring Insulator
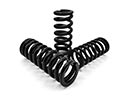 GMC Savana 1500 Coil Springs
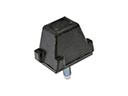 GMC Savana 1500 Control Arm Bumper
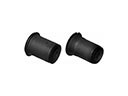 GMC Savana 1500 Control Arm Bushing
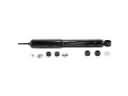 GMC Savana 1500 Shock Absorber
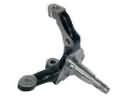 GMC Savana 1500 Spindle
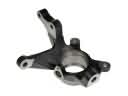 GMC Savana 1500 Steering Knuckle
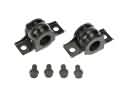 GMC Savana 1500 Sway Bar Bracket
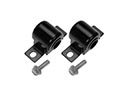 GMC Savana 1500 Sway Bar Bushing
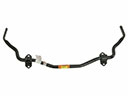 GMC Savana 1500 Sway Bar Kit
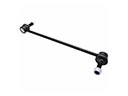 GMC Savana 1500 Sway Bar Link