ChevyParts
My Garage
My Account
Cart
OEM GMC Jimmy Ball Joint
Control Arm Joint- Select Vehicle by Model
- Select Vehicle by VIN
Select Vehicle by Model
orMake
Model
Year
Select Vehicle by VIN
For the most accurate results, select vehicle by your VIN (Vehicle Identification Number).
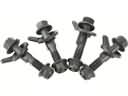
6 Ball Joints found


GMC Jimmy Ball Joint, Front Upper Part Number: 88911387
$34.91 MSRP: $62.33You Save: $27.42 (44%)Ships in 1-3 Business Days
GMC Jimmy Lower Ball Joint Part Number: 88967425
$65.21 MSRP: $107.41You Save: $42.20 (40%)Ships in 1-2 Business Days


GMC Jimmy Ball Joint, Lower Part Number: 9766423

GMC Jimmy Ball Joint Part Number: 9769576

GMC Jimmy Ball Joint, Front Lower Part Number: 19416895

GMC Jimmy Upper Ball Joint, Front Part Number: 19133669
GMC Jimmy Ball Joint
Want to cut long-term maintenance and repair costs? Choose OEM Ball Joint. Those parts deliver top durability you can trust. On our site, you'll find a huge catalog of genuine GMC Jimmy parts. Prices are unbeatable, so you can keep more in your pocket. Every OEM GMC Jimmy Ball Joint includes a manufacturer's warranty. You can also get an easy return policy that keeps buying risk free. Fast delivery, get your car on the road quickly. It's simple to search, compare, and order. Stop guessing about quality or fit. Order today and save with parts that last.
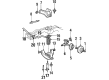
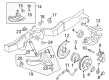
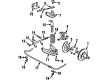
GMC Jimmy vehicles Ball Joint is known to play the role of suspension and steering systems where it links the control arm to the steering knuckle. Thus, these ball joints allow to turn with no restrictions in two perpendicular planes while at the same time not allowing for the translation movement which together with the mentioned above characteristics improves vehicle handling, stability and ride comfort. GMC Jimmy cars mostly have upper and lower ball joints; the additional ball joints in the rear suspension depend on the model. A ball joint is made of steel with a bearing stud and a socket enclosed in a rubber-like boot to keep them from coming in contact with dirty resulting in limited lubrication. These components are crucial in the way through which tire contacts the road with the aim of enhancing the performance of the vehicle.
GMC Jimmy Ball Joint Parts and Q&A
- Q: How to service and repair the lower ball joint on GMC Jimmy?A:First, lift and stabilize the vehicle using safety stands, guaranteeing that the floor jack is still under the lower Control Arm throughout removal and installation for safety reasons. Take off the tire and wheel, then remove the cotter pin from the stud and take out the Ball Joint to Steering Knuckle nut. Put the pry bar on the upper Control Arm and the bottom of the frame, and push downward gently. Working with someone to help, tap the Steering Knuckle near the Ball Joint stud carefully, and pull the Steering Knuckle out and downward toward the back while leaving the Control Arm suspended, so you don't damage the Brake Line. Drill a 6.35 mm (1/4 inch) hole in the middle of each rivet with a 3.175 mm (1/8 inch) drill, follow by drilling out the rivet heads with a 12.7 mm (1/2 inch) drill, and lastly, use a pin punch to remove the rivets before taking out the lower Ball Joint. Put the lower Ball Joint into the Control Arm, put in the retaining bolts and nuts, and tighten the lower Ball Joint retaining nuts until you reach 23 nm or 17 ft. Lbs. Before ending, connect the lower Ball Joint with the Steering Knuckle, tighten the stud nut to 108 nm (79 ft. Lbs.), and position the nut exactly right for the cotter pin, not rotating it further than 1/6 turn. Insert a fresh cotter pin and press its ends flat against the nut; then, put the wheel and tire back on, lower the vehicle, and check the alignment of the front wheels.

Related GMC Jimmy Parts
 GMC Jimmy Alignment Bolt
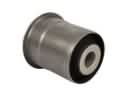 GMC Jimmy Axle Support Bushings
 GMC Jimmy Coil Spring Insulator
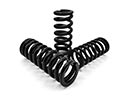 GMC Jimmy Coil Springs
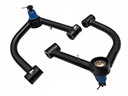 GMC Jimmy Control Arm
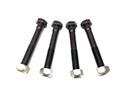 GMC Jimmy Control Arm Bolt
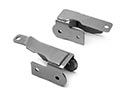 GMC Jimmy Control Arm Bracket
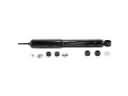 GMC Jimmy Shock Absorber
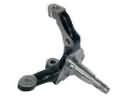 GMC Jimmy Spindle
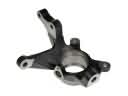 GMC Jimmy Steering Knuckle
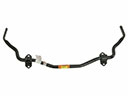 GMC Jimmy Sway Bar Kit
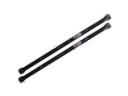 GMC Jimmy Torsion Bar