ChevyParts
My Garage
My Account
Cart
OEM GMC C2500 Coil Springs
Strut Spring- Select Vehicle by Model
- Select Vehicle by VIN
Select Vehicle by Model
orMake
Model
Year
Select Vehicle by VIN
For the most accurate results, select vehicle by your VIN (Vehicle Identification Number).
3 Coil Springs found


GMC C2500 Leaf Spring, Front Part Number: 15638995
$117.01 MSRP: $131.38You Save: $14.37 (11%)Ships in 1-2 Business Days
GMC C2500 Coil Spring, Front Part Number: 15528974

GMC C2500 Coil Spring, Front Part Number: 15058102
GMC C2500 Coil Springs
Want to cut long-term maintenance and repair costs? Choose OEM Coil Springs. Those parts deliver top durability you can trust. On our site, you'll find a huge catalog of genuine GMC C2500 parts. Prices are unbeatable, so you can keep more in your pocket. Every OEM GMC C2500 Coil Springs includes a manufacturer's warranty. You can also get an easy return policy that keeps buying risk free. Fast delivery, get your car on the road quickly. It's simple to search, compare, and order. Stop guessing about quality or fit. Order today and save with parts that last.
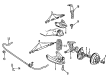
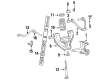
The GMC C2500 Coil Springs are parts that cannot be overlooked since they are responsible for improving the performance and durability of the GMC C2500 cars which are designed and built to be sturdy and strong. Coil Springs as its name implies supports the weight of the vehicles, take on the shocks of the road and controls the height of the car making it comfortable. Qualified by type of rate configuration to give comfort to the driver speaking of linear rate, progressive, and dual rate springs, GMC C2500 Coil Springs suit driving style, especially to those who would like to empower their car to handle heavy loads or those who want to magnify the car's sturdiness in handling powerful impacts. Applicable for the many types of GMC C2500 that was manufactured between 1960 and 1998, these parts are a testament to their flexibility in ensuring that truck owners get their vehicles custom fitted for work as well as safety. Coil Springs for GMC C2500 also reflect the overall quality of the vehicle and add to the model's ruggedness and capability of withstanding all sorts of forces that affect vehicle control. Ride height adjustments can be made precisely by using the features like coil overs or height adjustable springs and this adds extra value to the GMC C2500 Coil Springs in the auto market. Though there are a few GMC C2500 problems that seem to recur with some mechanical fluids like fuel and water pumps, its Coil Springs assure it a long-lasting reputation. In conclusion, the GMC C2500 coil springs are useful in enhancing the performance as well as the durability of these remarkable automobile to meet the expectations of the drivers in future.
GMC C2500 Coil Springs Parts and Q&A
- Q: How to replace the front coil springs on GMC C2500?A:First, make sure the car is supported at some points, then remove the shield and the cross bar on models 25 series. After that, unbolt and remove the tire and wheel assembly, the shock and the front stabilizer shaft link. Align j 23028-15 over the appropriate locating tab, depending on the engine type and link the retaining hook up to the Control Arm. Secure fitting with a wing nut tightened to keep freeplay from occurring. Put j 23028-01 into a transmission jack, secure it in place and lift them up so the yokes of j 23028-01 line up with the notches on j 23028-15. Take the tension away from the lower Control Arm pivot bolts using both your tools, remove the bolt nuts and then get rid of the rear pivot bolt and front pivot bolt for every series. Lift the front suspension just slightly and, using a pry bar if needed, gradually lower the transmission jack to take the weight off the front coil spring. After that, remove both the coil spring and its insulator. To install the spring and insulator, put them on the lower Control Arm, raise the transmission jack to get the spring short and use a pry bar to guide the arm to the right place. Secure the pivot bolts from the front and rear and don't forget to tighten the lower Control Arm pivot nuts to 145 nm (107 ft. Lbs.) for both series. After lowering the jack, remove j 23028-15 and then fit in the front stabilizer shaft link, shock absorber and the tire and wheel assembly. For the 25 models, put on the frame cross bar, tighten its nuts to 100 nm (74 ft. Lbs.) and then install the engine protection shield. Last, take off the safety stands so the vehicle can be lowered.

Related GMC C2500 Parts
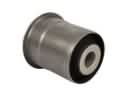 GMC C2500 Axle Support Bushings
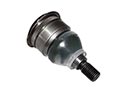 GMC C2500 Ball Joint
 GMC C2500 Camber and Alignment Kit
 GMC C2500 Control Arm Bolt
 GMC C2500 Control Arm Bushing
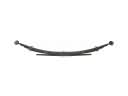 GMC C2500 Leaf Spring
 GMC C2500 Leaf Spring Bushing
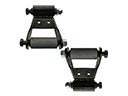 GMC C2500 Leaf Spring Shackle
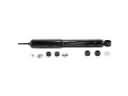 GMC C2500 Shock Absorber
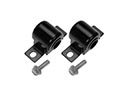 GMC C2500 Sway Bar Bushing
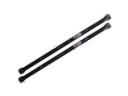 GMC C2500 Torsion Bar
 GMC C2500 Wheel Cover