ChevyParts
My Garage
My Account
Cart
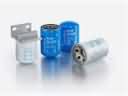
OEM Chevrolet Suburban 2500 Oil Filter
Engine Oil filter- Select Vehicle by Model
- Select Vehicle by VIN
Select Vehicle by Model
orMake
Model
Year
Select Vehicle by VIN
For the most accurate results, select vehicle by your VIN (Vehicle Identification Number).
3 Oil Filters found

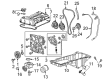
Chevrolet Suburban 2500 Oil Filter Part Number: 12731172
$5.35 MSRP: $9.56You Save: $4.21 (45%)
Chevrolet Suburban 2500 Oil Filter Part Number: 12708762
$6.54 MSRP: $11.68You Save: $5.14 (45%)Ships in 1-3 Business Days

Chevrolet Suburban 2500 Oil Filter Part Number: 12690386
$5.62 MSRP: $10.04You Save: $4.42 (45%)
Chevrolet Suburban 2500 Oil Filter
Want to cut long-term maintenance and repair costs? Choose OEM Oil Filter. Those parts deliver top durability you can trust. On our site, you'll find a huge catalog of genuine Chevrolet Suburban 2500 parts. Prices are unbeatable, so you can keep more in your pocket. Every OEM Chevrolet Suburban 2500 Oil Filter includes a manufacturer's warranty. You can also get an easy return policy that keeps buying risk free. Fast delivery, get your car on the road quickly. It's simple to search, compare, and order. Stop guessing about quality or fit. Order today and save with parts that last.
Chevrolet Suburban 2500 Oil Filter Parts and Q&A
- Q: How to service and repair the oil filter and replace the engine on Chevrolet Suburban 2500?A:You need the following tools to service and repair the Oil Filter while replacing the engine: engine lift brackets (J 36857). Engine lift brackets (J 36857). Place fender covers on both fenders after you open the hood and then lift the hood to its service position. The hood hinge bolts need removal before you raise the hood to its vertical position and install the bolts into its service position until it reaches proper tightness. First disconnect both the positive and negative Battery Cables before unclamping the Throttle Body and air cleaner and removing the air cleaner outlet duct. Wrench off the Ignition Coils then pressure off the fuel system and disconnect the fuel feed pipeline (1) and return pipeline (2) from the Fuel Rail. Start by taking out the air conditioning (A/C) compressor then follow with Radiator removal and next disconnect the throttle actuator control (TAC) module electrical connector along with vacuum lines followed by the exhaust gas recirculation (EGR) valve adapter while you also take out the ground cable bolt at the engine block and remove the generator and engine electrical harness before elevating the vehicle with safety stands. First remove the Starter motor and Power Steering Pump hoses and then disconnect the exhaust manifold pipe along with the Catalytic Converter and torque converter bolts and transmission bolt. Install the engine lift brackets (J 36857) to the rear of the right Cylinder Head and the front of the left Cylinder Head and secure them with gm P/N 9428217 and gm P/N 15650963 while tightening the bolts to 40 nm (30 ft. Lbs). Use a suitable lifting device to extract the engine by first removing the engine mount heat shield bolts and shields together with engine mount to engine mount bracket bolts. Lay the engine on a suitable stand before removing the generator bracket and A/C Compressor bracket and power steering bracket from the Cylinder Head. The next step will be to detach the lift brackets from the Cylinder Head. Attach the engine lift brackets (J 36857) to re-install the attaching bolt and washer using gm P/N 9428217 with gm P/N 15650963 while tightening the lift bracket bolts to 40 nm (30 ft. Lbs.). You should install the engine block mounted A/C Compressor/power steering mounting bracket with Power Steering Pump bracket bolts and nut torqued to 50 nm (37 ft. Lbs.) then tighten the generator bracket. The lifting device should be used to remove the engine before installation into the vehicle. The engine mount installation process includes mounting the engine mount to engine mount bracket bolts followed by engine mount heat shield and bolts then removing the engine lift hooks from the cylinder heads. Start by supporting the vehicle with safety stands after you raise it and then proceed to install the engine oil cooler lines on the engine block followed by bolts connecting engine to transmission and torque converter bolts and Catalytic Converter and exhaust manifold pipe and Power Steering Pump hoses and Starter motor. Handle the vehicle descent before putting the generator into position with the engine block ground cable connection followed by a 16 nm (12 ft. Lbs.) bolt torque on the engine wiring harness. Follow this installation sequence: connect the tac module electrical connector then install vacuum lines to the engine block and egr valve adapter and Radiator and positive and negative battery cables and lastly the A/C Compressor and ignition coils. After tightening the air cleaner outlet duct clamps the removal of fender covers should occur followed by lowering the hood to its normal position before installing and tightening hood hinge bolts to 25 nm (18 ft. Lbs.). Begin your engine start procedure by adding recommended oil of the right grade and quantity and use gm U.S. P/N 1052367, canada P/N 992869 or their equivalent. Start the engine by cranking then remove it from idle until you see oil pressure readings appear. After clear audible checks for noise or part bindings the technician will place the fuel pump Fuse back in the position and reconnect coil harness connectors to initiate engine start-up. The procedure includes another round of listening for abnormal sounds. Check the oil pressure with either the vehicle's built-in gauge or an external oil pressure gauge and maintain engine rpm at 1000 while it warms up to normal operating temperature. Afterward inspect for leaks from oil and coolant and perform a final check of engine liquids. Finish up with a crankshaft position (CKP) sensor variation learn procedure.

Related Chevrolet Suburban 2500 Parts
 Chevrolet Suburban 2500 Coolant Filter
 Chevrolet Suburban 2500 Crankshaft Pulley
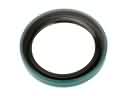 Chevrolet Suburban 2500 Crankshaft Seal
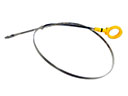 Chevrolet Suburban 2500 Dipstick
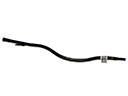 Chevrolet Suburban 2500 Dipstick Tube
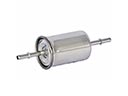 Chevrolet Suburban 2500 Fuel Filter
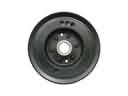 Chevrolet Suburban 2500 Harmonic Balancer
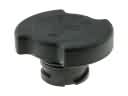 Chevrolet Suburban 2500 Oil Filler Cap
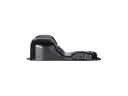 Chevrolet Suburban 2500 Oil Pan
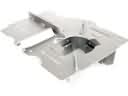 Chevrolet Suburban 2500 Oil Pan Baffle
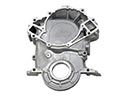 Chevrolet Suburban 2500 Timing Cover
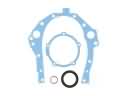 Chevrolet Suburban 2500 Timing Cover Gasket