ChevyParts
My Garage
My Account
Cart
OEM Chevrolet HHR Cam Gear
Camshaft Gear- Select Vehicle by Model
- Select Vehicle by VIN
Select Vehicle by Model
orMake
Model
Year
Select Vehicle by VIN
For the most accurate results, select vehicle by your VIN (Vehicle Identification Number).
3 Cam Gears found


Chevrolet HHR Camshaft Gear Part Number: 12621505
$128.26 MSRP: $223.84You Save: $95.58 (43%)


Chevrolet HHR Camshaft Gear Part Number: 90537632
$31.36 MSRP: $51.65You Save: $20.29 (40%)Ships in 1-3 Business Days


Chevrolet HHR Camshaft Gear, Green Line Part Number: 12578515
$108.50 MSRP: $268.12You Save: $159.62 (60%)Ships in 1-2 Business Days
Chevrolet HHR Cam Gear
Want to cut long-term maintenance and repair costs? Choose OEM Cam Gear. Those parts deliver top durability you can trust. On our site, you'll find a huge catalog of genuine Chevrolet HHR parts. Prices are unbeatable, so you can keep more in your pocket. Every OEM Chevrolet HHR Cam Gear includes a manufacturer's warranty. You can also get an easy return policy that keeps buying risk free. Fast delivery, get your car on the road quickly. It's simple to search, compare, and order. Stop guessing about quality or fit. Order today and save with parts that last.
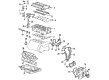
Cam Gear is one of the Chevrolet HHR parts connected to the camshaft; it is a gear responsible for the proper adjustment of valves timings. This adjustment is important in the process of maximizing the torque and horsepower of the vehicle through the provision of an advance or retard of the timing. The models of HHR may have incorporated different types of Cam Gear at some point in time, which come with different ways of enhancing the operation of the engine. Chevrolet HHR vehicle efficiency and power can only be optimised by adjusting the valve timing, hence the importance of the Cam Gear.
Chevrolet HHR Cam Gear Parts and Q&A
- Q: How to replace the Cam Gear on the Camshaft Position Exhaust Actuator on Chevrolet HHR?A:The first step to replace the camshaft position exhaust actuator involves camshaft cover removal. The next step requires removing the upper Timing Chain Guide bolts and guide before discarding the Timing Chain Tensioner. You can hold the camshaft with a 24 mm wrench as you loosen yet do not detach the exhaust camshaft actuator bolt but make sure all en 46327 tips should be deeply inserted into the Timing Chain. Use the tools from the en 46327 to keep the Timing Chain in place by mounting the equipment on each Timing Chain assembly side next to the intake and exhaust camshafts then apply tight torque to the nuts. Make clear marks to indicate the position of both intake and exhaust camshaft actuators and their positioning on the Timing Chain. Remove the exhaust camshaft actuator bolt by keeping the 24 mm wrench in position before discarding the bolt and extracting the exhaust camshaft actuator from the camshaft Timing Chain. The intake camshaft actuator should keep its alignment with the Timing Chain mark throughout installation. The procedure to install the exhaust camshaft actuator starts with placing the Timing Chain onto the actuator followed by alignment with the Timing Chain mark. Then secure the camshaft position with a new exhaust camshaft actuator bolt until it becomes snug. Screw in the new camshaft actuator bolt with the j 45059 tool until it reaches 85 n.m (63 lb ft) torque along with an additional 30-degree angle. First remove all old oil from the Timing Chain Tensioner followed by a measurement check for free movement and scoring on all components including the Timing Chain washer and o-ring to determine necessary replacement of the tensioner. The measurement for a new Timing Chain Tensioner assembly should be 72 mm (2.83 in) when the device exists in its fully compressed state. To check the tension, place the j 45027-2 inside a vise then insert the Piston assembly before using the j 45027-1 to wind the ratchet cylinder toward the Piston. The tensioner body receives a cleaning procedure for any present dirt and damage before the compressed Piston assembly goes back in while avoiding bottom-bore compression of the Piston. Check the tension to be 72 mm (2.83 mm) long across the end points; if the measurements are incorrect, follow the previous steps once more. The Timing Chain Tensioner installation into the cylinder head threaded hole should be completed along with a torque of 75 n.m (66 lb ft). A suitable tool equipped with a rubber tip must compress the Timing Chain Tensioner 2 mm (0.079 in) for its release before installing the upper Timing Chain Guide and its two bolts which require tightening to 10 n.m (89 lb in). Afterward, reinstall the camshaft cover.

Related Chevrolet HHR Parts
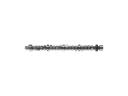 Chevrolet HHR Camshaft
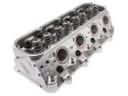 Chevrolet HHR Cylinder Head
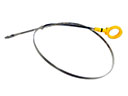 Chevrolet HHR Dipstick
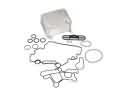 Chevrolet HHR Engine Oil Cooler
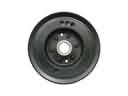 Chevrolet HHR Harmonic Balancer
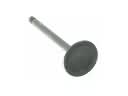 Chevrolet HHR Intake Valve
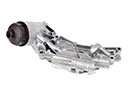 Chevrolet HHR Oil Cooler
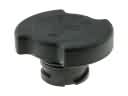 Chevrolet HHR Oil Filler Cap
 Chevrolet HHR Timing Belt Tensioner
 Chevrolet HHR Timing Chain Guide
 Chevrolet HHR Timing Cover
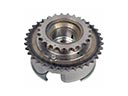 Chevrolet HHR Variable Timing Sprocket