ChevyParts
My Garage
My Account
Cart
OEM Chevrolet Classic Engine Control Module
Engine Control Computer- Select Vehicle by Model
- Select Vehicle by VIN
Select Vehicle by Model
orMake
Model
Year
Select Vehicle by VIN
For the most accurate results, select vehicle by your VIN (Vehicle Identification Number).
1 Engine Control Module found

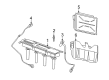
Chevrolet Classic Control Module Part Number: 19210073
Chevrolet Classic Engine Control Module
Want to cut long-term maintenance and repair costs? Choose OEM Engine Control Module. Those parts deliver top durability you can trust. On our site, you'll find a huge catalog of genuine Chevrolet Classic parts. Prices are unbeatable, so you can keep more in your pocket. Every OEM Chevrolet Classic Engine Control Module includes a manufacturer's warranty. You can also get an easy return policy that keeps buying risk free. Fast delivery, get your car on the road quickly. It's simple to search, compare, and order. Stop guessing about quality or fit. Order today and save with parts that last.
Chevrolet Classic Engine Control Module Parts and Q&A
- Q: How to replace the Engine Control Module (ECM) on Chevrolet Classic?A:Replacing the powertrain control module (PCM) should start with switching off the ignition to avoid internal damage when operating on the pcm connector. The first step involves disconnecting the negative Battery Cable because the removal of the left closeout/insulator panel follows next. To disconnect the pcm harness connectors push down the locking tab and pull up the release lever while being careful to avoid touching the pins and soldered components on the pcm to prevent electrostatic discharge damage. Use the pcm retaining tab to depress it while lifting the pcm away from the pcm bracket. Check that the service number written on the new pcm corresponds with the faulty unit. The new pcm insertion should proceed until the retaining tab finds its locking position before you attach the pcm harness connectors and secure their release levers. Return the left closeout/insulator panel then reconnect the negative terminal of the battery. To finish up programming includes both pcm replacement programming followed by the implementation of the crankshaft position (CKP) system variation learn process.

Related Chevrolet Classic Parts
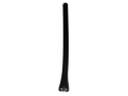 Chevrolet Classic Antenna Mast
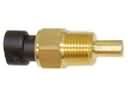 Chevrolet Classic Coolant Temperature Sensor
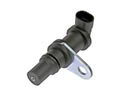 Chevrolet Classic Crankshaft Position Sensor
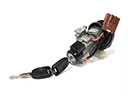 Chevrolet Classic Igniter
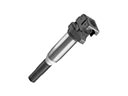 Chevrolet Classic Ignition Coil
 Chevrolet Classic Ignition Control Module
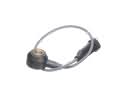 Chevrolet Classic Knock Sensor
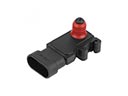 Chevrolet Classic MAP Sensor
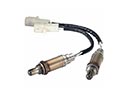 Chevrolet Classic Oxygen Sensor
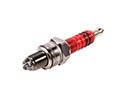 Chevrolet Classic Spark Plug
 Chevrolet Classic Speed Sensor
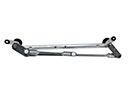 Chevrolet Classic Wiper Pivot