ChevyParts
My Garage
My Account
Cart
OEM Chevrolet Astro Transmission Oil Cooler Hose
- Select Vehicle by Model
- Select Vehicle by VIN
Select Vehicle by Model
orMake
Model
Year
Select Vehicle by VIN
For the most accurate results, select vehicle by your VIN (Vehicle Identification Number).
2 Transmission Oil Cooler Hoses found

Chevrolet Astro Cooler Pipe, Upper Part Number: 15053318
$33.60 MSRP: $53.35You Save: $19.75 (38%)Ships in 1-2 Business DaysChevrolet Astro Cooler Pipe, Upper Part Number: 15674609
Chevrolet Astro Transmission Oil Cooler Hose
Want to cut long-term maintenance and repair costs? Choose OEM Transmission Oil Cooler Hose. Those parts deliver top durability you can trust. On our site, you'll find a huge catalog of genuine Chevrolet Astro parts. Prices are unbeatable, so you can keep more in your pocket. Every OEM Chevrolet Astro Transmission Oil Cooler Hose includes a manufacturer's warranty. You can also get an easy return policy that keeps buying risk free. Fast delivery, get your car on the road quickly. It's simple to search, compare, and order. Stop guessing about quality or fit. Order today and save with parts that last.
Chevrolet Astro Transmission Oil Cooler Hose Parts and Q&A
- Q: How to replace the Transmission Oil Cooler Hose on Chevrolet Astro?A:Vehicle elevation is the first step when replacing the transmission fluid cooler hose or pipe. Securely pull the plastic cap from quick connect fittings until it reaches about two inches beyond their original positions before removing oil cooler lines from the Radiator and transmission. A bent-tip screwdriver should be used to rotate and remove the retaining ring from the quick connect fitting for discarding. To remove a cooler line from the vehicle you should first let it fully extend from the connector while also removing all retaining rings (E-clips) linking the line to available quick connect fittings. Only new oil lines and fittings and retaining rings must be used for installation purposes. Follow this procedure to install the new retaining ring (E-clip): guide its half into one of the slots on the quick connect fitting and rotate it while ensuring the three clearance holes move through the slots without restriction. Each line of the cooler should receive a new plastic cap before installation and it is necessary to replace damaged caps. When installing cooler lines into the vehicle, users must place the end of the cooler line into the quick connect fitting until they hear or feel a click and should not place the plastic cap for installation. To verify proper fitting attachment pull the cooler line firmly backward before placing the plastic cap on the fitting without using your hand to depress the retaining ring and ensuring total fitting coverage without gaps with the yellow tube identification completely hidden inside. Place the final oil cooler line ends into both transmission and Radiator.

Related Chevrolet Astro Parts
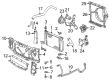
 Chevrolet Astro Water Pump
 Chevrolet Astro Automatic Transmission Oil Cooler Line
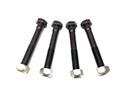 Chevrolet Astro Control Arm Bolt
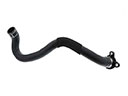 Chevrolet Astro Coolant Pipe
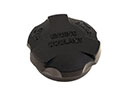 Chevrolet Astro Coolant Reservoir Cap
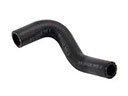 Chevrolet Astro Cooling Hose
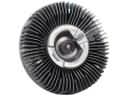 Chevrolet Astro Fan Clutch
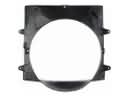 Chevrolet Astro Fan Shroud
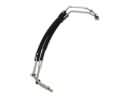 Chevrolet Astro Oil Cooler Hose
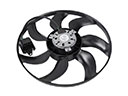 Chevrolet Astro Radiator fan
 Chevrolet Astro Radiator Support
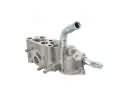 Chevrolet Astro Thermostat Housing