ChevyParts
My Garage
My Account
Cart
OEM Cadillac XLR Evaporator
A/C Evaporator Core- Select Vehicle by Model
- Select Vehicle by VIN
Select Vehicle by Model
orMake
Model
Year
Select Vehicle by VIN
For the most accurate results, select vehicle by your VIN (Vehicle Identification Number).
1 Evaporator found

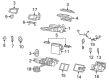
Cadillac XLR Evaporator Core Part Number: 89018847
Cadillac XLR Evaporator
Want to cut long-term maintenance and repair costs? Choose OEM Evaporator. Those parts deliver top durability you can trust. On our site, you'll find a huge catalog of genuine Cadillac XLR parts. Prices are unbeatable, so you can keep more in your pocket. Every OEM Cadillac XLR Evaporator includes a manufacturer's warranty. You can also get an easy return policy that keeps buying risk free. Fast delivery, get your car on the road quickly. It's simple to search, compare, and order. Stop guessing about quality or fit. Order today and save with parts that last.
The Cadillac XLR Evaporator is one of the additional parts that define the brand's ambitions to provide durability and power in the line of luxury roadster models. Named the Cadillac XLR Evaporator, this component helps to cool the air optimally in the cabin, which ensures passengers' comfort. Sitting conveniently under the dashboard this evaporator employs the use of aluminium fins to change the liquid refrigerant to gas, hence cooling and removing humidity from the air. It is relevant to tune with versatile Cadillac XLR models because it retains the mode of performance of the car regardless of the model. The Cadillac XLR Evaporator is designed to be safe from temperature change and rus include corrosion thus making it to be the optimal when it comes to market needs. That, in return, underlines the significance of the evaporator's maintenance to address potential problems such as the presence of odors or reduced cooling capacity to improve both efficiency and safety. In particular, Cadillac XLR Evaporator can be considered as quite extraordinary in the field of automotive due to the sturdiness of its construction and the complex that controls the XLR's optioned equipment like heated and cooled leather seats and a complex navigation system. Bearing in mind its history of the performance, Cadillac XLR Evaporator also connect with the driving experience as well the car's reliability for Cadillac's engineering and designing that makes XLR to remain symbolic to Luxury and innovation.
Cadillac XLR Evaporator Parts and Q&A
- Q: How to replace the air conditioning evaporator core on Cadillac XLR?A:The required tools for Evaporator core air conditioning replacement include halogen leak detector (J 39400-A). The first step involves eliminating the hvac module followed by discarding the hvac module assembly foam seal. Begin by unplugging the txv then taking out all mounting bolts of the Evaporator core before extracting the txv device while discarding both sealing washers. Disconnect the electrical connectors and wiring harness pin that belongs to the discharge temperature management sensor device from the hvac module. Place the wiring harness to the side after removing it from the Heater Core cover wire harness retainers. Remove screws from the heater cover of the hvac module followed by removing the heater cover and the Heater Core separately. The Evaporator core extraction requires separating the upper case and the lower case after unscrewing the hvac module case retaining screws. Add the designated pag oil to the new Evaporator core directly and position the seal to face its corners. Position the Evaporator core into the hvac module while inserting new side, upper and two lower seals to the Evaporator core. Rebuild the hvac module by fitting the upper case onto the lower case before securing it with retaining screws that need to be tightened to 1.6 n.m (14 lb in). The procedure includes implementing a fresh foam seal to the Heater Core before reinstalling the Heater Core and heater cover while securing the cover screws to 1.6 n.m (14 lb in). The hvac wiring harness requires connection to the Heater Core cover wiring harness retainers. At the same time, attach the wiring harness retainer pin to the hvac module. The dtm sensor electrical pins should be connected while new sealing washers should be installed on the Evaporator core before attaching and bolting the txv to 7 n.m (62 lb in). The work ends by returning the hvac system back into place.

Related Cadillac XLR Parts
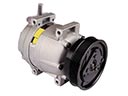 Cadillac XLR A/C Compressor
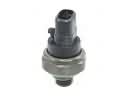 Cadillac XLR A/C Compressor Cut-Out Switches
 Cadillac XLR A/C Condenser
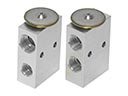 Cadillac XLR A/C Expansion Valve
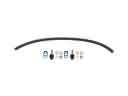 Cadillac XLR A/C Hose
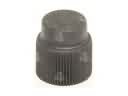 Cadillac XLR A/C Service Cap
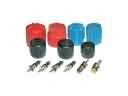 Cadillac XLR A/C System Valve Core
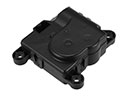 Cadillac XLR Blend Door Actuator
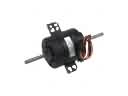 Cadillac XLR Blower Motor
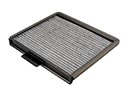 Cadillac XLR Cabin Air Filter
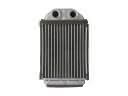 Cadillac XLR Heater Core
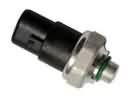 Cadillac XLR HVAC Pressure Switch