ChevyParts
My Garage
My Account
Cart
OEM Cadillac XLR Battery Cable
Car Battery Cable- Select Vehicle by Model
- Select Vehicle by VIN
Select Vehicle by Model
orMake
Model
Year
Select Vehicle by VIN
For the most accurate results, select vehicle by your VIN (Vehicle Identification Number).
2 Battery Cables found

Cadillac XLR Positive Cable Part Number: 88987107

Cadillac XLR Negative Cable Part Number: 19116218
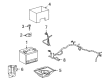
Cadillac XLR Battery Cable
Want to cut long-term maintenance and repair costs? Choose OEM Battery Cable. Those parts deliver top durability you can trust. On our site, you'll find a huge catalog of genuine Cadillac XLR parts. Prices are unbeatable, so you can keep more in your pocket. Every OEM Cadillac XLR Battery Cable includes a manufacturer's warranty. You can also get an easy return policy that keeps buying risk free. Fast delivery, get your car on the road quickly. It's simple to search, compare, and order. Stop guessing about quality or fit. Order today and save with parts that last.
The Battery Cable can be described as the functional and wire connections that facilitate the transfer of electrical current from the vehicle battery to the starter and engine ignition in Cadillac XLR. This battery cable is well known for its toughness and optimized performance for road use hence boosting the efficiency and safety of Cadillac XLR. Specific to models of the Cadillac XLR between 2003 and 2009, the battery cable boasts a heavy duty design that comprises of a power supply cable which is a positive cable, and an earth cable that makes up the complete circuit, a closed loop system. The Battery Cable should be checked now and then since it may rip or corrode, which may affect the connection and the performance of the car. The Caddy Battery Cable for the XLR has particularly made a named for itself in the Cadillac automotive market given the fact that the product is made of the premier materials and has the premier engineering to give it longevity and the premier functional capability. Being a component that ensures that the Cadillac XLR's V8 Northstar engine is well supplied with the necessary power to continue running and that the car's performance characteristics such as acceleration and the like remain high, it can therefore be said that the Battery Cable is a very important part of the car. Thus, Battery Cable is more than just spare parts, it is an integral part used in Cadillac XLR models that mark the spirit of luxury roadster car and provide maximum comfort and maneuverability on the road.
Cadillac XLR Battery Cable Parts and Q&A
- Q: How to safely disconnect and reconnect the negative battery cable on Cadillac XLR?A:Disabling sir is essential before battery negative cable removal because it stops component deployment and prevents injury. All electrical servicing procedures must be done only when the ignition key is in off or lock and all electrical loads are turned off. A risk of handling live electrical terminations requires immediate battery negative cable disconnection. Record all your vehicle's preset radio stations as well as the radio theftlock(R) activation code before the process begins. First cut off all lamp power and accessory systems then verify you switch off the ignition before removing the negative Battery Cable from the battery. To mount the assembly install the battery negative cable onto the battery then secure the terminal bolt at 8 n.m (71 lb in). Before cable attachment to the battery users should clean away oxidation buildup by brushing the contact surface. Beyond the theftlock(R) radio you must unlock, restore your preferred radio stations and adjust the clock and power window initialization.
- Q: How to replace the LH2 Battery Cable assembly on the 8 CYL, 4.6L, DOHC, HO engine on Cadillac XLR?A:The battery positive and negative cable assembly replacement process requires starting with disconnecting the battery negative cable from the battery on lh2 - 8 cyl, 4.6l, dohc, ho engines. Open the positive cable nut at the battery before you remove the cable from the battery terminal. You must first remove the battery positive cable lead from the fuse/relay center stud while opening the stud cover then removing the battery positive cable nut. Rephrase the procedure by removing the Battery Cable clips before detaching the battery negative cable from its frame rail stud by taking off the nut installation. The procedure continues with removing the Battery Cable bolt to free the battery negative cable and engine harness ground pack installed at the right rear cylinder head and afterwards separating the intake manifold. Disengage the starter jumper wiring harness from the engine harness connector before removing the electrochemical connection at the positive Battery Cable terminal. Proceed to detach both terminals from the solenoid body. Remove the terminal from the generator stud while pulling backward the boot of the battery positive/starter cable and unfastening the battery positive/starter cable nut and terminal connection. Drain the battery positive cable routing clip bolt while also uninstalling the battery positive and negative cable assembly. Place the cable terminal first on the generator stud while positioning the wire between 2 and 4 o'clock before installing the terminal nut with a torque of 20 n.m (15 lb ft). Route the boot over its position before you attach the positive Battery Cable routing clip bolt into the retaining clip and tighten it to 35 n.m (26 lb ft). Before adding the positive cable terminal install the solenoid harness leads then attach the positive cable terminals to the Starter Solenoid and tighten the large and small nuts to 12 n.m (106 lb in) and 4 n.m (35 lb in) respectively. Install the starter jumper wiring harness on the engine harness connector after reinstalling the intake manifold and positioning both the negative Battery Cable and ground pack from the engine harness on the right rear cylinder head. Then install the Battery Cable bolt. Secure the battery positive cable routing clip bolt at 35 n.m (26 lb ft) while routing the battery negative cable to the frame rail stud before installing the negative Battery Cable nut set to 11 n.m (97 lb in). Secure the battery clips in position while leading the positive Battery Cable to the fuse/relay center stud then tightening the positive Battery Cable nut to 12 n.m (106 lb in). Screw the positive Battery Cable to the fuse/relay center stud before closing its stud cover while using 8 n.m tightening force on the nut and connecting the negative Battery Cable.


Related Cadillac XLR Parts
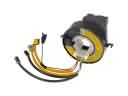 Cadillac XLR Air Bag Clockspring
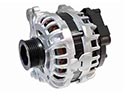 Cadillac XLR Alternator
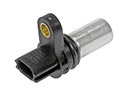 Cadillac XLR Camshaft Position Sensor
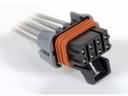 Cadillac XLR Chassis Wiring Harness Connector
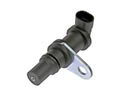 Cadillac XLR Crankshaft Position Sensor
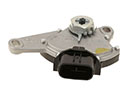 Cadillac XLR Neutral Safety Switch
 Cadillac XLR Parking Assist Distance Sensor
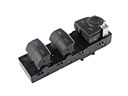 Cadillac XLR Power Window Switch
 Cadillac XLR Seat Switch
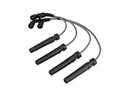 Cadillac XLR Spark Plug Wires
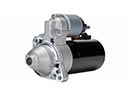 Cadillac XLR Starter
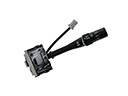 Cadillac XLR Wiper Switch