ChevyParts
My Garage
My Account
Cart
OEM Cadillac Headlight Relay
Headlamp Relay- Select Vehicle by Model
- Select Vehicle by VIN
Select Vehicle by Model
orMake
Model
Year
Select Vehicle by VIN
For the most accurate results, select vehicle by your VIN (Vehicle Identification Number).
11 Headlight Relays found


Cadillac Fuel Pump Relay, Black Part Number: 19116962
$8.38 MSRP: $15.74You Save: $7.36 (47%)Ships in 1-2 Business DaysProduct Specifications- Other Name: Relay, Air Conditioner Electrical; Multi Purpose Relay; Fog Light Relay; Fan Relay; Horn Relay; Compressor Relay; Relay
- Replaced by: 13500113


Cadillac Fan Relay, Black Part Number: 96484304
$11.52 MSRP: $20.58You Save: $9.06 (45%)Ships in 1-2 Business DaysProduct Specifications- Other Name: Pump, Engine Coolant; Rear Window Defroster Relay; Multi Purpose Relay


Cadillac Fuel Pump Relay, Black Part Number: 13503103
$5.21 MSRP: $11.57You Save: $6.36 (55%)Ships in 1-2 Business DaysProduct Specifications- Other Name: Relay Assembly, Fan Control *Black; Daytime Running Light, Rear Window Defroster, Multi Purpose, Cooling Fan, ABS Relay
- Replaces: 12193612, 12193602, 12177234, 15328865, 19115298, 19116363, 21997408, 12077865, 12135198


Cadillac Fuel Pump Relay, Black Part Number: 13500126
$11.94 MSRP: $22.42You Save: $10.48 (47%)Ships in 1-3 Business DaysProduct Specifications- Other Name: Relay Assembly, Windshield Wiper Motor, Daytime Light, Rear Defroster, Blower Resistor, Multi Purpose, Fog Light
- Replaces: 12077866, 12135180, 15393413, 15328867, 19115082, 92181835, 92199311, 19116058


Cadillac Circuit Breaker Part Number: 13500114
$10.16 MSRP: $21.40You Save: $11.24 (53%)Ships in 1-2 Business DaysProduct Specifications- Other Name: Relay Assembly, Accessory Time Delay *Gray; DRL, Rear Defroster, Multi-Purpose, Fog, Fuel Pump, Headlight, ABS, Flasher
- Replaces: 12135170, 12193606, 12088567, 12135034, 15328866, 15393412, 19115080, 19116057, 92199312


Cadillac Relay Part Number: 24432680
$19.68 MSRP: $68.78You Save: $49.10 (72%)Ships in 1-2 Business DaysProduct Specifications- Other Name: Relay, Headlamp; Multi Purpose Relay; Relay, Capsule/Headlamp/Fog Lamp; Relay, Fuel Pump
- Replaces: 24433728, 90508807

Cadillac Control Relay Part Number: 13598343
$12.46 MSRP: $23.40You Save: $10.94 (47%)Product Specifications- Other Name: Relay

Cadillac Fuel Pump Relay Part Number: 13502676
$6.47 MSRP: $11.56You Save: $5.09 (45%)Ships in 1-2 Business DaysProduct Specifications- Other Name: Relay Assembly-Multiuse; Daytime Running Light Relay; Multi Purpose Relay; Multi-Purpose Relay; Micro-Relay
- Replaces: 12135084, 12065118, 12065125, 92109510

Cadillac Relay, Gray Part Number: 13455283
$21.96 MSRP: $41.24You Save: $19.28 (47%)Ships in 1-2 Business DaysProduct Specifications- Other Name: Multi Purpose Relay

Cadillac Control Relay Part Number: 90274683
Product Specifications- Other Name: Relay; Multi Purpose Relay
- Position: Driver Side

Cadillac Relay Part Number: 90543014
Product Specifications- Other Name: Relay, Fan Control
- Position: Passenger Side
Cadillac Headlight Relay
Choose OEM Headlight Relay, you're making the optimal decision for superior quality and perfect performance. You can feel confident because each component goes through stringent quality checks. Every part is carefully built to comply with Cadillac's factory specifications. You'll enjoy a smooth, worry-free installation that fits just right. At ChevyPartsDeal.com, you'll find it easy to get top-quality OEM Cadillac Headlight Relay. You can shop at highly competitive prices and protect your budget. All our genuine Cadillac parts include a dependable manufacturer's warranty. You'll also appreciate our straightforward return policy and swift delivery services for extra convenience.
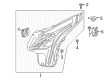
The Cadillac Headlight Relay is a high amperage relay that directs lamps and maintains the beams constant and without glare once the sun goes down. Having been born in 1902, Cadillac established a reputation of daring design, smooth engines, and interiors that combine refined metal and soft leather, and luxury can still make drivers feel the rush. Cadillac fans are seeing old-fashioned tail fins transform into the hand-crafted electric Celestiq, and the brand is continuing to explore new technological spaces without abandoning the nimble road dynamics that make the long commutes enjoyable. Cadillac also overpacks dashboards with sharp displays and intelligent interfaces that reduce distraction, and even a teenager can learn how to use the controls with a single finger. Lap time, concept cars, aggressive styling signals, and decades of racing all contribute to a fleet that draws attention in traffic and tells you they are sure in front of the engine is started. The Headlight Relay is an internal lighting circuit between the low-current stalk switch and the hungry filament load, and closes only when ordered to pass the full battery to the load, avoiding switch melt, voltage drop, and flicker during harsh weather. Since the Headlight Relay carries the large current, wiring remains cooler and lasts longer, and as such, the driver is provided with the same lighting whether cruising the city street or zipping down the empty highway after midnight. Change a worn Headlight Relay in minutes and the lamps are blazing as bright as in the factory, and it proves one small part ensures visibility and confidence throughout the entire line.
Cadillac Headlight Relay Parts and Q&A
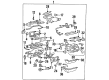
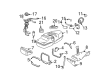
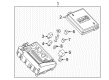
- Q: How to replace the headlight relay on Cadillac DeVille?A:The repair process for headlamp relay replacement begins by unlocking the hood followed by taking off the protective covering from the underhood fuse block. Start by removing the headlamp relay (3 or 4) of either the high beam or low beam lighting from the underhood fuse block. To replace the headlamp relay (3 or 4) place it back into the underhood fuse block after replacing the protective cover which completes the installation process and then close the hood.
- Q: How to replace the headlight relay on Cadillac Eldorado?A:Commence the headlamp relay replacement by opening the hood then removing the washer hose before taking out the retainer clip of the cruise control cable. First remove the multi-use relay and fuse bracket cover as well as electrical tape from the relays. The Relay Puller Pliers (J 43244) must be used to draw out the failed headlamp relay from the multi-use relay and fuse center before removal of the relay. Installation of the new headlamp relay should begin with using Relay Puller Pliers (J 43244) to insert the component into the multi-use relay and fuse center followed by wrapping the relays with new electrical tape. Place the multi-use relay and fuse bracket cover onto the bracket then fasten it with the clips. Fasten the cruise control cable to the retention clip which sits on the left strut tower while securing it. The washer solvent hose installation needs completion before you close the hood.


Related Cadillac Parts
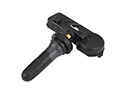 Cadillac TPMS Sensor
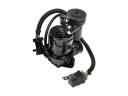 Cadillac Air Suspension Compressor
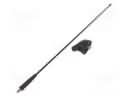 Cadillac Antenna
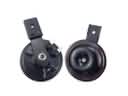 Cadillac Horn
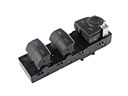 Cadillac Power Window Switch
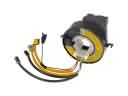 Cadillac Air Bag Clockspring
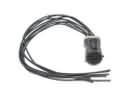 Cadillac Body Wiring Harness Connector
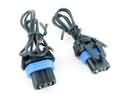 Cadillac Fog Light Connector
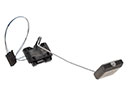 Cadillac Fuel Tank Sending Unit
 Cadillac Mirror Switch
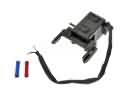 Cadillac Shift Interlock Solenoid
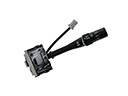 Cadillac Wiper Switch