ChevyParts
My Garage
My Account
Cart
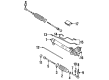
OEM Cadillac Eldorado Tie Rod
Steering Tie Rod- Select Vehicle by Model
- Select Vehicle by VIN
Select Vehicle by Model
orMake
Model
Year
Select Vehicle by VIN
For the most accurate results, select vehicle by your VIN (Vehicle Identification Number).
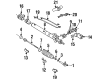
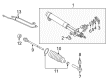
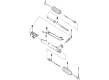
8 Tie Rods found


Cadillac Eldorado Inner Tie Rod Part Number: 26021769
$119.09 MSRP: $189.08You Save: $69.99 (38%)Ships in 1-3 Business Days
Cadillac Eldorado Tie Rod, Inner Part Number: 26026745
$107.47 MSRP: $215.79You Save: $108.32 (51%)


Cadillac Eldorado Tie Rod, Outer Part Number: 21011027

Cadillac Eldorado Tie Rod End, Inner Part Number: 7833122

Cadillac Eldorado Tie Rod End, Outer Part Number: 7830666
Cadillac Eldorado Outer Tie Rod Part Number: 7847368

Cadillac Eldorado Outer Tie Rod Part Number: 26067285

Cadillac Eldorado Outer Tie Rod Part Number: 19418694
$82.22 MSRP: $128.78You Save: $46.56 (37%)
Cadillac Eldorado Tie Rod
Want to cut long-term maintenance and repair costs? Choose OEM Tie Rod. Those parts deliver top durability you can trust. On our site, you'll find a huge catalog of genuine Cadillac Eldorado parts. Prices are unbeatable, so you can keep more in your pocket. Every OEM Cadillac Eldorado Tie Rod includes a manufacturer's warranty. You can also get an easy return policy that keeps buying risk free. Fast delivery, get your car on the road quickly. It's simple to search, compare, and order. Stop guessing about quality or fit. Order today and save with parts that last.
Cadillac Eldorado Tie Rod Parts and Q&A
- Q: How to replace the inner tie rod on Cadillac Eldorado?A:The inner Tie Rod replacement process begins by eliminating the Rack and Pinion Boot combined with the breather tube while maintaining rack position for process safety. Start with removing the shock dampener from the inner Tie Rod assembly before sliding it onto the rack . To detach the inner Tie Rod assembly from the rack assembly position a wrench against the rack assembly flats and another against the inner Tie Rod housing flats before counterclockwise rotation until it separates from the rack. Start by having a firm grip on the rack as you move the shock dampener toward the rack's front side. Before fastening the inner Tie Rod to the rack use a torque wrench on the inner Tie Rod housing together with a wrench on the rack assembly to tighten the component to 100 nm (74 ft. Lbs.). Place the Piston and steering rack along with the inner Tie Rod into a vise where the inner Tie Rod demonstrates free movement within the housing before final installation. A combination of hammer and drift tool fuses both inner Tie Rod housing flats to the rack assembly structure. You need to insert a 0.25 mm feeler gauge between the Piston and steering rack and the inner Tie Rod housing so the feeler gauge does not pass between the two. Finish up by placing the shock dampener on the inner Tie Rod housing to allow the front lip of the dampener to settle against the housing before reinstalling the Rack And Pinion Boot along with the breather tube.

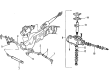
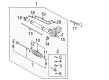
Related Cadillac Eldorado Parts
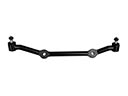 Cadillac Eldorado Center Link
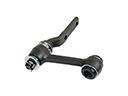 Cadillac Eldorado Idler Arm
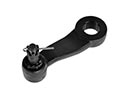 Cadillac Eldorado Pitman Arm
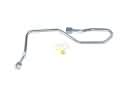 Cadillac Eldorado Power Steering Hose
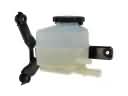 Cadillac Eldorado Power Steering Reservoir
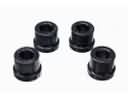 Cadillac Eldorado Rack & Pinion Bushing
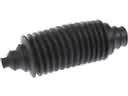 Cadillac Eldorado Rack and Pinion Boot
 Cadillac Eldorado Steering Column Seal
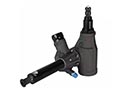 Cadillac Eldorado Steering Gearbox
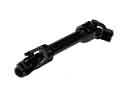 Cadillac Eldorado Steering Shaft
 Cadillac Eldorado Tie Rod Adjusting Sleeve
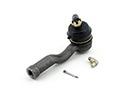 Cadillac Eldorado Tie Rod End