ChevyParts
My Garage
My Account
Cart
OEM Buick Rainier Coil Springs
Strut Spring- Select Vehicle by Model
- Select Vehicle by VIN
Select Vehicle by Model
orMake
Model
Year
Select Vehicle by VIN
For the most accurate results, select vehicle by your VIN (Vehicle Identification Number).
3 Coil Springs found


Buick Rainier Coil Spring, Front Part Number: 15125881


Buick Rainier Spring, Front Part Number: 15125884


Buick Rainier Coil Spring, Rear Part Number: 15948005
Buick Rainier Coil Springs
Want to cut long-term maintenance and repair costs? Choose OEM Coil Springs. Those parts deliver top durability you can trust. On our site, you'll find a huge catalog of genuine Buick Rainier parts. Prices are unbeatable, so you can keep more in your pocket. Every OEM Buick Rainier Coil Springs includes a manufacturer's warranty. You can also get an easy return policy that keeps buying risk free. Fast delivery, get your car on the road quickly. It's simple to search, compare, and order. Stop guessing about quality or fit. Order today and save with parts that last.
Buick Rainier Coil Springs Parts and Q&A
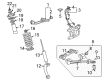
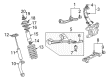
- Q: How to service and repair a coil springs and shock absorber on Buick Rainier?A:Start the shock absorber service by lifting the vehicle and keeping it supported before you take out the tire along with the wheel. After supporting the vehicle through lifting it properly you need to detach the shock module while also unscrewing the shock module yoke to shock absorber pinch bolt and nut. A flat-bladed tool enables you to open the shock module yoke at the pinch bolt before removing it from the shock absorber. Secure heater hose pieces along the shock module spring at the area where the strut spring compressor (J45400) touches the lower spring section and position the shock module within the strut spring compressor (J45400). Begin turning the forcing screw of the spring compressor and decrease the coil spring length so the shock absorber operates without hindrance. The shock absorber upper retaining nut should be removed before pulling the shock absorber from the shock module. Tap the compressor forcing screw to release its pressure so the upper mounting plate and coil spring become detachable from the strut spring compressor (J45400). First install the coil spring together with the upper mounting plate onto the strut spring compressor (J45400) before compressing the spring again. Next place the shock absorber onto the shock module before tightening the retaining nut to 45 nm (33 ft. Lbs.) torque. Gently remove the shock module from strut spring compressor (J45400) before removing heater hose parts connected to the shock module spring. Secure the shock module yoke to the shock absorber through the pinch bolt followed by the nut before tightening it to 70 nm (52 ft. Lbs.). Reinstall the shock module to the vehicle before your tire and wheel replacement and lower the vehicle.
- Q: How to replace a Coil Springs and Shock Absorber on Buick Rainier?A:The replacement process for shock absorbers begins with raising and supporting the vehicle in proper position. Start by removing the wheel along with the tire before extracting the shock module from the automobile. To detach the shock module yoke from the shock absorber start by removing the pinch bolt and nut followed by spreading the yoke at the pinch bolt with a flat-bladed tool. Install strips of heater hose into the shock module spring slot which receives the strut spring compressor (J 45400) during shock absorber replacement. Place the shock module into strut spring compressor j 45400 while checking that the shock absorber moves without resistance under compression. The spring compressor forcing screw needs to be turned until coil spring compression is reached before extracting the upper retaining nut and pulling out the shock absorber from the shock module. The compressor forcing screw requires loosenage to extract the upper mounting plate combined with coil spring from the strut spring compressor (J 45400). Position the upper mounting plate together with the compressed coil spring into the strut spring compressor (J 45400) before tightening the spring. The shock absorber should be fixed to the shock module through the retaining nut which requires a torque of 45 n.m (33 lb ft). Drop the shock module from the strut spring compressor (J 45400) before removing the heater hose sections attaching to the shock module spring. Secure the shock module yoke to the shock absorber by using a pinch bolt followed by a nut then tighten it to 70 n.m (52 lb ft). Put back the shock module inside the vehicle before reattaching the tire and wheel while lowering the vehicle.


Related Buick Rainier Parts
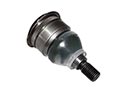 Buick Rainier Ball Joint
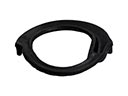 Buick Rainier Coil Spring Insulator
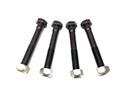 Buick Rainier Control Arm Bolt
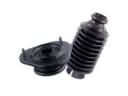 Buick Rainier Shock and Strut Boot
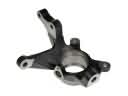 Buick Rainier Steering Knuckle
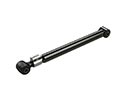 Buick Rainier Suspension Strut Rod
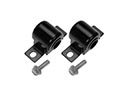 Buick Rainier Sway Bar Bushing
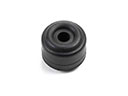 Buick Rainier Sway Bar Link Bushing
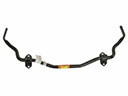 Buick Rainier Sway Bars
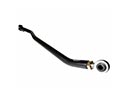 Buick Rainier Track Bar
 Buick Rainier Trailing Arm
 Buick Rainier Wheel Hub