ChevyParts
My Garage
My Account
Cart
OEM Buick Lucerne Antenna Cable
Radio Antenna Cable- Select Vehicle by Model
- Select Vehicle by VIN
Select Vehicle by Model
orMake
Model
Year
Select Vehicle by VIN
For the most accurate results, select vehicle by your VIN (Vehicle Identification Number).
8 Antenna Cables found

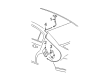
Buick Lucerne Antenna Cable Part Number: 15886505
$19.16 MSRP: $36.00You Save: $16.84 (47%)Ships in 1-2 Business Days
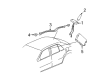
Buick Lucerne Antenna Cable Part Number: 19117362
$22.23 MSRP: $41.74You Save: $19.51 (47%)Ships in 1-3 Business Days
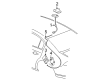
Buick Lucerne Antenna Cable Part Number: 19117360
$22.44 MSRP: $42.16You Save: $19.72 (47%)Ships in 1-2 Business DaysBuick Lucerne Antenna Cable Part Number: 15869731
$34.06 MSRP: $56.09You Save: $22.03 (40%)Ships in 1-3 Business DaysBuick Lucerne Antenna Cable Part Number: 25772460
$30.77 MSRP: $48.20You Save: $17.43 (37%)Ships in 1-3 Business Days
Buick Lucerne Harness Part Number: 15873786
Buick Lucerne Harness Part Number: 15931304
Buick Lucerne Antenna Cable Part Number: 19116807
Buick Lucerne Antenna Cable
Want to cut long-term maintenance and repair costs? Choose OEM Antenna Cable. Those parts deliver top durability you can trust. On our site, you'll find a huge catalog of genuine Buick Lucerne parts. Prices are unbeatable, so you can keep more in your pocket. Every OEM Buick Lucerne Antenna Cable includes a manufacturer's warranty. You can also get an easy return policy that keeps buying risk free. Fast delivery, get your car on the road quickly. It's simple to search, compare, and order. Stop guessing about quality or fit. Order today and save with parts that last.
As a crucial element the Buick Lucerne Antenna Cable helps improve the audio system reliability while guaranteeing superior performance for all Buick Lucerne vehicles. Signal transmission for audio entertainment and communication functions optimally through the connection between the radio antenna and receiver provided by the Antenna Cable especially when operating in difficult conditions. During the production years 2005 to 2011 Buick Lucerne owners could select from internal, external and satellite antennas which enhanced signal quality in their vehicles. The Antenna Cable's importance stands critical because poor reception emerges from cable damage requiring immediate replacement to preserve audio functionality in the Buick Lucerne. The Lucerne owners can easily improve their audio performance through the straightforward replacement process. A reliable reputation accompanies the Buick model due to its parts' performance excellence which includes the Antenna Cable that serves as an essential component for both operational maturity and security functions. The car combines its advanced safety systems and Magnetic Ride Control technology with the Antenna Cable to produce a high performing driving experience. Engineers at the automaker have created a popular premium sedan with the car while the Antenna Cable demonstrates their dedication to performance excellence.
Buick Lucerne Antenna Cable Parts and Q&A
- Q: How to replace the digital radio antenna cable on Buick Lucerne?A:To replace the digital radio Antenna Cable, start by removing the upper rear quarter trim panel and the rear assist handles to not bend the headliner too much damaging it. Lower the rear of the headliner; unsolder the Antenna Cable from the clips (2,3) and remove the connection of the Antenna Cable from above the am/fm Antenna module, removing foam tape from this connection. Next, remove the connectors from the radio Antenna to allow you to tie a bit of wire or string to the end of the Antenna wire. Pull off the connection of the Antenna Cable from the digital receiver and remove the left rear compartment trim panel. Take the Antenna Cable out of the clips and the rear harness, and pull it through to the rear compartment, and take the wire or string out of the Antenna Cable before taking the cable off from the vehicle. To put in place, tie the wire or string to the new cable and gently pull the Antenna Cable over the rear shelf into the passenger compartment, then take off the wire or string. Connect the Antenna Cable connection to the digital receiver and clip the Antenna Cable to the hold-down clips in the rear compartment. Replace the trim panel in the left rear compartment and attach the Antenna connectors to the digital radio Antenna, and wrap a connector with foam tape. Revert the Antenna Cable hook up above the am/fm Antenna module and attach the Antenna Cable to the locating clips on the roof, the third pillar, and to the headliner in the line with the roof panel finally ante-rail the back side handles, and the higher rear quarter trim panel.

Related Buick Lucerne Parts
 Buick Lucerne Body Control Module
 Buick Lucerne Fuel Pump Relay
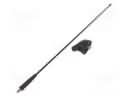 Buick Lucerne Antenna
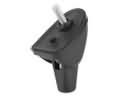 Buick Lucerne Antenna Base
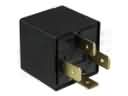 Buick Lucerne Daytime Running Light Relay
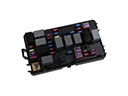 Buick Lucerne Fuse
 Buick Lucerne Horn Relay
 Buick Lucerne Ignition Relay
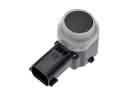 Buick Lucerne Parking Assist Sensor
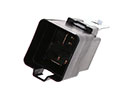 Buick Lucerne Radiator Fan Relay
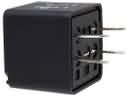 Buick Lucerne Relay
 Buick Lucerne Starter Relay