ChevyParts
My Garage
My Account
Cart
OEM 2009 Cadillac XLR Rack And Pinion
Steering Rack And Pinion- Select Vehicle by Model
- Select Vehicle by VIN
Select Vehicle by Model
orMake
Model
Year
Select Vehicle by VIN
For the most accurate results, select vehicle by your VIN (Vehicle Identification Number).
1 Rack And Pinion found

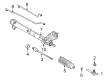
2009 Cadillac XLR Steering Gear Part Number: 19330432
Product Specifications- Other Name: Gear Kit, Steering (Remanufacture); Gear Assembly
- Replaces: 19207783, 19180558, 19210003
- Item Weight: 30.60 Pounds
- Item Dimensions: 6.2 x 56.2 x 11.7 inches
- Condition: Remanufactured
- Fitment Type: Direct Replacement
- SKU: 19330432
- Warranty: This genuine part is guaranteed by GM's factory warranty.
2009 Cadillac XLR Rack And Pinion
With a comprehensive array of OEM 2009 Cadillac XLR Rack And Pinion, from fuel pumps to door handles, our website is a one-stop-shop for your needs. All our genuine 2009 Cadillac XLR Rack And Pinion are backed by the manufacturer's warranty and are offered at competitive prices in the market. Rest assured, you can shop with complete confidence.
2009 Cadillac XLR Rack And Pinion Parts and Q&A
- Q: How to Replace the Front Rack and Pinion on 2009 Cadillac XLR?A: A Rack And Pinion replacement requires suspension of the vehicle followed by tire removal. The first step requires disconnecting the tie rod ends from their position on steering knuckles as well as the separation of the intermediate shaft from the power Rack And Pinion. Extract the stabilizer shaft and power steering pressure and return hoses as well as the power steering line hold-downs from the crossmember. You need to start by removing the brake pressure modulator valve (BPMV) bracket then the two front crossmember mounting nuts. After that focus only on loosening the two rear crossmember mounting nuts while leaving them in place. Remove the height sensor arm from its connection to the Control Arm before using a utility stand to support the crossmember's front end. Lowering the coil spring with the j 33432-a (Leaf Spring Compressor) device allows the technician to extract the crossmember. Start work by unbolting the lower shock mounting bolts followed by removal of the left front brake caliper brake pipe bracket and right front brake pipe plastic hold-down. Move the Rack And Pinion mounting bolts and nuts out before guiding the Rack And Pinion through the left wheelhouse opening around brake lines. Insert the Rack And Pinion through the left wheelhouse opening and install mounting bolts and nuts which need tightening up to 100 nm (74 lb ft). Lower shock mounting bolts are reinstalled while using a utility stand to lift the crossmember next the removal of j 33432-a. Install crossmember mounting nuts before tightening them to 110 nm (81 lb ft) and reinstall the brake pipe bracket for the left front brake caliper and plastic brake pipe hold-down for the right front brake pipe. Route the power steering pressure hose and return hose to the Rack And Pinion then apply 27 nm (20 lb ft) of fitting torque and secure the crossmember hold-downs. Safely place the stabilizer shaft and intermediate shaft on the Rack And Pinion while reattaching the height sensor arm to its Control Arm. Bleed the power steering system after reattaching the steering knuckles to tie rod ends and replacing tires and wheels and lowering the vehicle. Front wheel toe must then be adjusted.
Related 2009 Cadillac XLR Parts
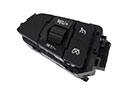 2009 Cadillac XLR Cruise Control Switch
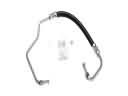 2009 Cadillac XLR Hydraulic Hose
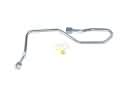 2009 Cadillac XLR Power Steering Hose
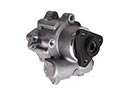 2009 Cadillac XLR Power Steering Pump
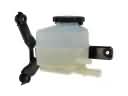 2009 Cadillac XLR Power Steering Reservoir
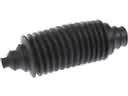 2009 Cadillac XLR Rack and Pinion Boot
 2009 Cadillac XLR Steering Column Cover
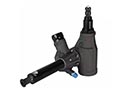 2009 Cadillac XLR Steering Gearbox
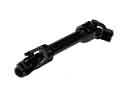 2009 Cadillac XLR Steering Shaft
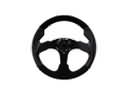 2009 Cadillac XLR Steering Wheel
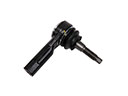 2009 Cadillac XLR Tie Rod
 2009 Cadillac XLR Upper Steering Column Bearing