ChevyParts
My Garage
My Account
Cart
OEM 2009 Cadillac STS Brake Booster
Brake Power Booster- Select Vehicle by Model
- Select Vehicle by VIN
Select Vehicle by Model
orMake
Model
Year
Select Vehicle by VIN
For the most accurate results, select vehicle by your VIN (Vehicle Identification Number).
2 Brake Boosters found

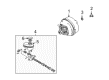
2009 Cadillac STS Brake Booster Part Number: 20800046
Product Specifications- Other Name: Booster, Hydraulic Power Brake Booster; Booster Assembly
- Replaces: 25847715, 19303634
- Item Weight: 12.60 Pounds
- Item Dimensions: 14.4 x 14.4 x 10.3 inches
- Condition: New
- Fitment Type: Direct Replacement
- SKU: 20800046
- Warranty: This genuine part is guaranteed by GM's factory warranty.
2009 Cadillac STS Brake Booster Part Number: 20800045
Product Specifications- Other Name: Booster, Hydraulic Power Brake Booster; Booster Assembly
- Replaces: 20762405
- Item Weight: 9.60 Pounds
- Item Dimensions: 14.1 x 12.7 x 12.7 inches
- Condition: New
- Fitment Type: Direct Replacement
- SKU: 20800045
- Warranty: This genuine part is guaranteed by GM's factory warranty.
2009 Cadillac STS Brake Booster
With a comprehensive array of OEM 2009 Cadillac STS Brake Booster, from fuel pumps to door handles, our website is a one-stop-shop for your needs. All our genuine 2009 Cadillac STS Brake Booster are backed by the manufacturer's warranty and are offered at competitive prices in the market. Rest assured, you can shop with complete confidence.
2009 Cadillac STS Brake Booster Parts and Q&A
- Q: How to replace the Power Vacuum Brake Booster (LHD) on 2009 Cadillac STS?A: You need to take out the left side instrument panel insulator panel to do power vacuum Brake Booster replacement. Disconnect the rubber clip from the vacuum Brake Booster Pushrod then take off the Pushrod connection to the brake pedal. Take out the cross vehicle brace when replacing the booster system with power vacuum brake. Take off the master cylinder nuts holding the unit while you set its brake pipes back aside on heavy mechanics wire. Take out the radiator surge tank without needing to disconnect its hoses. Detach the link that connects the vacuum Brake Booster check valve to its hose assembly. Reform the j-22805-b (Brake Booster Holder) by extending its mounting holes and taking 6.36 mm (0.25 in) material from the inside edges to achieve 80.00 mm (3.15 in) span. Fasten the modified j-22805-b Brake Booster holder to its base and secure it with master cylinder nuts. Press the locking tab while turning the holder and booster counter-clockwise to unlock them from the bracket. Afterward gently push the booster forward to find and remove the Pushrod retaining clip. Detach the Pushrod from the booster by taking off its retaining clip and take out the vacuum Brake Booster from the car. Insert the Pushrod backwards through the dust boot location inside the vehicle if needed. Keep the booster's interior parts in place while installing and inspect the locking flanges for no damage. Set the vacuum Brake Booster in place and join its Pushrod to its port by locking the retaining clip. Turn the booster one continuous rotation until the locking feature hooks onto the cowl flange then take away the holder and dispose of the master cylinder nuts. Integrate the Brake Booster valve and hollow assembly before setting up the master cylinder using new nuts tightened at 25 nm (18 lb ft). Connect the master cylinder fluid level sensor wires back in place while installing the radiator surge tank and cross vehicle brace when present. Position the Pushrod wave washer then bushing before fitting the pedal pivot end and locking the retaining clip. The sensor control must be calibrated before the left side instrument panel insulator panel goes back in.
Related 2009 Cadillac STS Parts
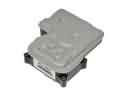 2009 Cadillac STS ABS Control Module
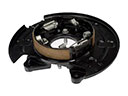 2009 Cadillac STS Brake Backing Plate
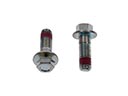 2009 Cadillac STS Brake Caliper Bolt
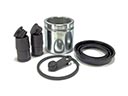 2009 Cadillac STS Brake Caliper Repair Kit
 2009 Cadillac STS Brake Calipers
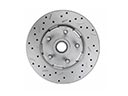 2009 Cadillac STS Brake Disc
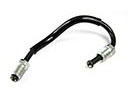 2009 Cadillac STS Brake Line
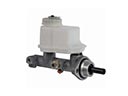 2009 Cadillac STS Brake Master Cylinder
 2009 Cadillac STS Brake Pad
 2009 Cadillac STS Brake Shoe
 2009 Cadillac STS Parking Brake Cable
 2009 Cadillac STS Parking Brake Shoe