ChevyParts
My Garage
My Account
Cart
OEM 2005 Chevrolet Express 2500 Distributor
Ignition Distributor- Select Vehicle by Model
- Select Vehicle by VIN
Select Vehicle by Model
orMake
Model
Year
Select Vehicle by VIN
For the most accurate results, select vehicle by your VIN (Vehicle Identification Number).
1 Distributor found


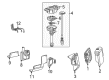
2005 Chevrolet Express 2500 Distributor Assembly Part Number: 12598210
Product Specifications- Other Name: Distributor; Distributor, Ignition
- Replaces: 01104078, 1104050, 1104078, 01104050, 01104057, 93441559, 1104057
- Item Weight: 2.60 Pounds
- Item Dimensions: 15.9 x 8.3 x 5.3 inches
- Condition: New
- Fitment Type: Direct Replacement
- SKU: 12598210
- Warranty: This genuine part is guaranteed by GM's factory warranty.
2005 Chevrolet Express 2500 Distributor
With a comprehensive array of OEM 2005 Chevrolet Express 2500 Distributor, from fuel pumps to door handles, our website is a one-stop-shop for your needs. All our genuine 2005 Chevrolet Express 2500 Distributor are backed by the manufacturer's warranty and are offered at competitive prices in the market. Rest assured, you can shop with complete confidence.
2005 Chevrolet Express 2500 Distributor Parts and Q&A
- Q: How to replace the distributor in an engine on 2005 Chevrolet Express 2500?A: Before changing the Distributor make sure to turn off the ignition, remove engine cover, air cleaner assembly and air intake resonator assembly. Compare the rotor's position with the cylinder it belongs to using the heater and the vacuum pipe connection. Disconnect the Spark Plug Wires from the Distributor Cap as follows: twist each wire boot 1/2 turn and simply pull on the boot. The electrical connection at the base of the Distributor is next to be pulled out, also, the 2 screws holding the Distributor Cap in place are to be removed and thrown away. Disconnect the Distributor Cap and use the grease pencil to mark the position of rotor with reference to the housing of Distributor and also the Intake Manifold of Distributor's. While you are pulling the Distributor out, observe that the rotor will rotate counter-clockwise about 42 degrees and put a mark number 2 on the base of the Distributor for realignment when installing. Your next step is to remove the mounting clamp hold-down bolt; pull out the Distributor. For installation procedure 1: using a new Distributor assembly, put 2 marks in the new housing at the same place as the original. Align rustor to the second mark , guide the Distributor on the engine, and bring the hole at hold down base on the engine cover hole at the Intake Manifold. As you install, the rotor will turn clockwise 42 degrees. Ensure the rotor segment is aligned with mark on the Distributor base. If there is a misalignment, remove and re-mount the Distributor. If you see any oil spill in the oil filler valve tube, feel free to replace that tube as well. Tighten the Distributor mounting clamp bolt to 25 n.m (18 lb ft) and fit the Distributor Cap while fitting the Distributor Cap screws that are new that need to be tightened to 2.4 n.m (21 lb in). Reconnect the electrical connector, reinstall the Spark Plug Wires and ignition coil wire making sure all are initially correct. Following the installation, if the malfunction indicator lamp lights up with a value of dtc p1345, the Distributor has been installed incorrectly. For installation method 2, turn the crankshaft balancer in a clockwise direction so that the alignment marks fall on the engine front cover tabs so that the number 1 Piston is at tdc of the compression stroke. Assemble the bottom stem of the Distributor with the white paint mark aligned with the pre-drilled indent hole in the gear with the make note of the rotor segment aligning as shown for a v6 engine. Using a long screwdriver, align the oil pump drive shaft with the Distributor's drive tab and guide the latter into the engine with the flat part in the direction of the car's front; the rotor segment must be aligned with the Distributor's pointer on the base of the latter. Make sure the Distributor mounting bolt is tightened to 25 n.m (18 lb ft) and fit the Distributor Cap then tighten new screws to 2.4 n.m (21 lb in), reconnect the electrical connector and plug in the spark plug and ignition coil wire making sure that it is in the correct orientation. Repeat installation procedure 2 should the malfunction indicator lamp light up following installation signifying a wrong installation. Finally, install the engine cover.
Related 2005 Chevrolet Express 2500 Parts
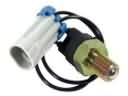 2005 Chevrolet Express 2500 Back Up Light Switch
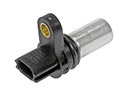 2005 Chevrolet Express 2500 Camshaft Position Sensor
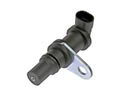 2005 Chevrolet Express 2500 Crankshaft Position Sensor
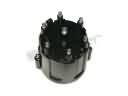 2005 Chevrolet Express 2500 Distributor Cap
 2005 Chevrolet Express 2500 Distributor Reluctor
 2005 Chevrolet Express 2500 Engine Control Module
 2005 Chevrolet Express 2500 Igniter
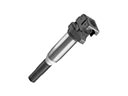 2005 Chevrolet Express 2500 Ignition Coil
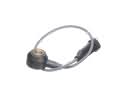 2005 Chevrolet Express 2500 Knock Sensor
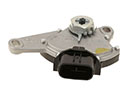 2005 Chevrolet Express 2500 Neutral Safety Switch
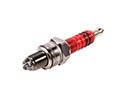 2005 Chevrolet Express 2500 Spark Plug
 2005 Chevrolet Express 2500 Spark Plug Wires