ChevyParts
My Garage
My Account
Cart
OEM 2004 Chevrolet Blazer Universal Joint
U-Joint- Select Vehicle by Model
- Select Vehicle by VIN
Select Vehicle by Model
orMake
Model
Year
Select Vehicle by VIN
For the most accurate results, select vehicle by your VIN (Vehicle Identification Number).
2 Universal Joints found


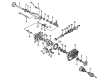
2004 Chevrolet Blazer Universal Joints Part Number: 89059111
$163.83 MSRP: $273.43You Save: $109.60 (41%)Ships in 1-2 Business DaysProduct Specifications- Other Name: Joint Kit, Front Axle Propeller Shaft Universal *Outside Snap; Slip Yoke; Joint Kit, Propeller Shaft Universal Joint
- Position: Front
- Replaces: 12472409, 12476231, 12471503, 12522048, 26049843, 88982758, 88964507, 94772179, 12476230
- Item Weight: 1.90 Pounds
- Item Dimensions: 4.1 x 4.1 x 1.6 inches
- Condition: New
- Fitment Type: Direct Replacement
- SKU: 89059111
- Warranty: This genuine part is guaranteed by GM's factory warranty.


2004 Chevrolet Blazer Universal Joints Part Number: 23104840
$51.81 MSRP: $88.98You Save: $37.17 (42%)Product Specifications- Other Name: Joint Kit, Propeller Shaft Universal Joint; U Joint
- Position: Front
- Replaces: 12471502, 12479126, 26042371
- Item Weight: 1.80 Pounds
- Item Dimensions: 5.9 x 5.4 x 2.9 inches
- Condition: New
- Fitment Type: Direct Replacement
- SKU: 23104840
- Warranty: This genuine part is guaranteed by GM's factory warranty.
2004 Chevrolet Blazer Universal Joint
With a comprehensive array of OEM 2004 Chevrolet Blazer Universal Joint, from fuel pumps to door handles, our website is a one-stop-shop for your needs. All our genuine 2004 Chevrolet Blazer Universal Joint are backed by the manufacturer's warranty and are offered at competitive prices in the market. Rest assured, you can shop with complete confidence.
2004 Chevrolet Blazer Universal Joint Parts and Q&A
- Q: How to replace the universal joint with an external snap ring on 2004 Chevrolet Blazer?A: Start your universal joint replacement project by getting both the J9522-3 U-Joint Bearing Separator and J9522-5 U-Joint Bearing Spacer Remover tools. Position the propeller shaft horizontally and steer clear of tube contact that can hurt the parts. Note the propeller shaft ends before you take it apart. Use pliers to take apart snap rings and work the cup end with a tap if the joint does not release pressure. Place the U-Joint Bearing Separator (J9522-3) between open horizontal bearing cups then apply it to the lower yoke ear's support surface while using a 30 mm or 27 mm socket head. When the first bearing cup fails to extract push the U-Joint Bearing Spacer Remover (J9522-5) between the seal and the cup. Keep pushing to push out the besing cup. When rotating the propeller shaft you push one bearing cup toward the slip yoke position to determine tube fitting with the yoke. Examine all bearing cup grooves and bores inside the yoke for any signs of damage before processing the parts for reassembly. Place one bearing cup into the yoke opening so its trunnion fit smoothly before pushing it until flush with the ear surface. Press the other bearing cup into position while keeping trunnion alignment right and verifying its movement. Check if the needle bearings face each other properly when unsatisfactory movement occurs during assembly. After seeing the bearing cup retainer groove you must add the bearing retainer blocks and keep pushing until they snap into position. A dead blow hammer works well to fully install the retainer. Apply chassis grease over the snap ring to simplify its placement within the bearing cup groove.
Related 2004 Chevrolet Blazer Parts
 2004 Chevrolet Blazer Differential
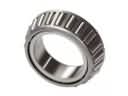 2004 Chevrolet Blazer Differential Bearing
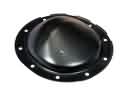 2004 Chevrolet Blazer Differential Cover
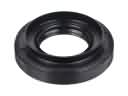 2004 Chevrolet Blazer Differential Seal
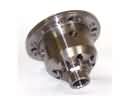
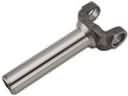 2004 Chevrolet Blazer Driveshaft Yokes
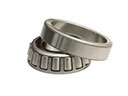 2004 Chevrolet Blazer Pinion Bearing
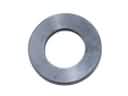 2004 Chevrolet Blazer Pinion Washer
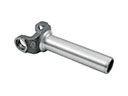 2004 Chevrolet Blazer Slip Yoke
 2004 Chevrolet Blazer Wheel Seal