ChevyParts
My Garage
My Account
Cart
OEM 2001 GMC Jimmy Distributor
Ignition Distributor- Select Vehicle by Model
- Select Vehicle by VIN
Select Vehicle by Model
orMake
Model
Year
Select Vehicle by VIN
For the most accurate results, select vehicle by your VIN (Vehicle Identification Number).
1 Distributor found


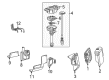
2001 GMC Jimmy Distributor Assembly Part Number: 12598210
Product Specifications- Other Name: Distributor; Distributor, Ignition
- Replaces: 01104078, 1104050, 1104078, 01104050, 01104057, 93441559, 1104057
- Item Weight: 2.60 Pounds
- Item Dimensions: 15.9 x 8.3 x 5.3 inches
- Condition: New
- Fitment Type: Direct Replacement
- SKU: 12598210
- Warranty: This genuine part is guaranteed by GM's factory warranty.
2001 GMC Jimmy Distributor
With a comprehensive array of OEM 2001 GMC Jimmy Distributor, from fuel pumps to door handles, our website is a one-stop-shop for your needs. All our genuine 2001 GMC Jimmy Distributor are backed by the manufacturer's warranty and are offered at competitive prices in the market. Rest assured, you can shop with complete confidence.
2001 GMC Jimmy Distributor Parts and Q&A
- Q: How to replace the distributor in an engine on 2001 GMC Jimmy?A: The replacement process for a Distributor starts by turning off the ignition point while pulling off the air cleaner and Distributor Cap sparks through each wire boot turn half a turn and suction on the wire boot. First disconnect the electrical connector from the Distributor base before removing two screws holding the Distributor Cap in place and discarding those screws. Before installing new marks on the Distributor housing use a grease pencil to indicate the Distributor rotor position and Distributor housing alignment and Intake Manifold position. Pull out the Distributor while keeping an eye on the rotor's counter-clockwise movement that reaches about 42 degrees after bolt removal. Home engine repair begins with Distributor assembly mark duplicates on new equipment then rotor allocation to second mark before Distributor insertion followed by base hole alignment at Intake Manifold hole. When installing the Distributor the rotor rotates in a clockwise direction approximately 42 degrees until it settles and the rotor segment should position itself against the first mark. The Distributor needs removal followed by reinstallment if the marks between original housing and new one do not match. Use a 25 n.m torque wrench to tighten the Distributor clamp bolt after installing new screws that require 2.4 n.m torque to tighten into the Distributor Cap. Then restore the electrical connection before installing Spark Plug Wires and the ignition coil wire properly oriented to their boots. The vehicle's malfunction indicator lamp turns on when dtc p1345 triggers and indicates the Distributor has an installation problem. You should position the number 1 cylinder at top dead center (TDC) compression stroke while ensuring the crankshaft balancer marks match with the engine front cover tabs during installation procedure 2. Install the Distributor by aligning its white paint mark on the stem bottom with the pre-drilled indent hole in the gear. This alignment marks the Distributor driven gear, shaft, and rotor holes to prevent misalignment. Position the gear correctly before inserting the Distributor into the engine while maintaining spark plug tower alignment to the center of the engine. The Distributor base pointer needs the rotor segment to reach alignment before fully seating into position. The gear mesh alignment requires correction through re-execution of the procedure when the Distributor base points are not aligned properly. Secure the clamp bolt at 25 n.m (18 lb ft) torque before attaching the Distributor Cap with new screws set to 2.4 n.m (21 lb in). Reattach the electrical connector then place the Spark Plug Wires and ignition coil wire with correct wire orientation. Repeating installation procedure 2 becomes necessary when the malfunction indicator lamp remains lit after completion of installation.
Related 2001 GMC Jimmy Parts
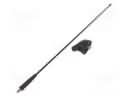 2001 GMC Jimmy Antenna
 2001 GMC Jimmy Automatic Transmission Shift Levers
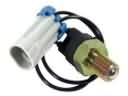 2001 GMC Jimmy Back Up Light Switch
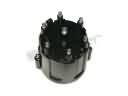 2001 GMC Jimmy Distributor Cap
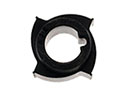 2001 GMC Jimmy Distributor Reluctor
 2001 GMC Jimmy Engine Control Module
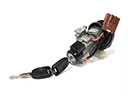 2001 GMC Jimmy Igniter
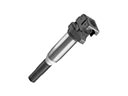 2001 GMC Jimmy Ignition Coil
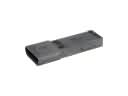 2001 GMC Jimmy Ignition Control Module
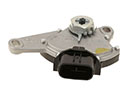 2001 GMC Jimmy Neutral Safety Switch
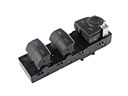 2001 GMC Jimmy Power Window Switch
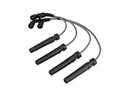 2001 GMC Jimmy Spark Plug Wires